Troubleshooting DIY 3D Printer Issues: Fixing Common Problems
In the ever-evolving world of 3D printing, DIY enthusiasts are often faced with a plethora of challenges. From frustrating print quality issues to filament clogging problems, the road to achieving perfection can be paved with obstacles.
This article aims to provide a comprehensive guide on troubleshooting common problems that plague DIY 3D printers. By delving into the intricacies of calibration challenges, bed adhesion troubles, and software and firmware glitches, we offer a systematic approach to liberating DIYers from their printing woes.
Key Takeaways
- Proper calibration is crucial for eliminating print quality issues such as visible layer lines and misalignment.
- Filament clogs can be prevented by regularly inspecting and cleaning the filament path, using high-quality filament, and adjusting extruder temperature and nozzle size.
- Bed adhesion troubles, such as warping and poor first layer adhesion, can be improved by using a heated bed, applying adhesive, ensuring proper bed leveling, and maintaining a clean print bed surface.
- Software and firmware glitches can impact the performance of DIY 3D printers, so it's important to check for loose connections, keep the software up to date, and calibrate the printer's firmware settings.
Print Quality Issues
One of the most common print quality issues that DIY 3D printer users encounter is the presence of visible layer lines on their prints. These lines can significantly affect the overall appearance and smoothness of the printed object, detracting from its desired quality. To address this issue, a systematic troubleshooting approach is necessary.
Firstly, it is essential to ensure that the printer is properly calibrated. Incorrect calibration can lead to misalignment of the print layers, resulting in visible lines. Adjusting the printer's bed leveling and nozzle height can help eliminate this problem.
Another potential cause of layer lines is insufficient or uneven filament flow. This can occur due to clogged or partially blocked nozzles, inconsistent extruder temperature, or improper filament tension. Regularly cleaning the nozzle and checking the filament feed system can help resolve these issues.
Additionally, poor print settings or inadequate slicer configurations can contribute to the presence of layer lines. Adjusting parameters such as layer height, print speed, and infill density can help improve the print quality and minimize the appearance of lines.
Filament Clogging Problems
To effectively address filament clogging problems in DIY 3D printers, it is crucial to understand the common causes and implement appropriate solutions.
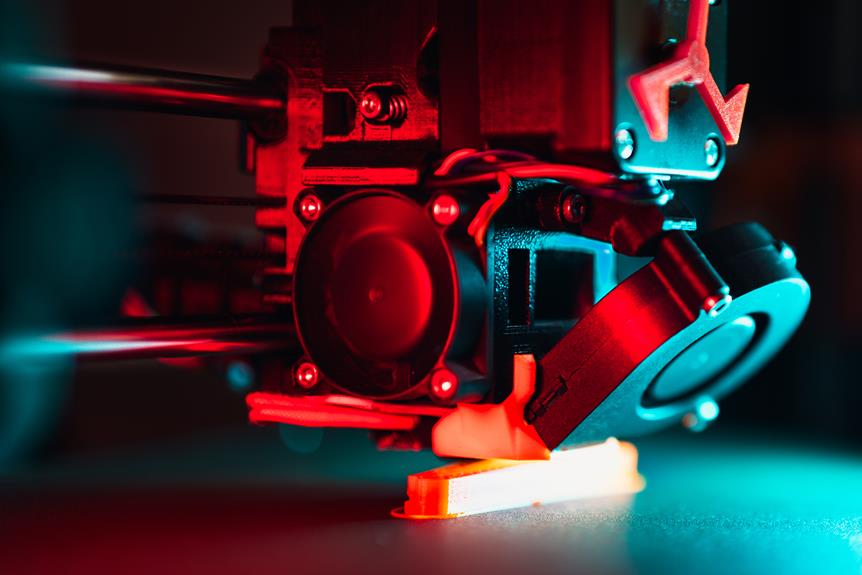
Filament clogs can occur due to various reasons such as low-quality filament, incorrect extruder temperature, or improper nozzle size. One common cause is the presence of debris or dust particles in the filament, which can obstruct the smooth flow of material through the nozzle. Regularly inspecting and cleaning the filament path can help prevent such clogs. Additionally, using high-quality filament and ensuring the extruder temperature is set correctly can also minimize the chances of clogging.
If a clog does occur, there are several DIY printer fixes that can be tried. First, manually removing the clog by heating the nozzle and carefully clearing the blockage with a thin wire or needle can often solve the problem. Another option is to use a specialized cleaning filament that can help dislodge any debris or obstructions in the nozzle. In more severe cases, disassembling the extruder and cleaning it thoroughly may be necessary.
Calibration Challenges
The calibration challenges that arise in DIY 3D printers can often be resolved with careful adjustments and attention to detail. Proper calibration is crucial for achieving accurate and high-quality 3D prints. Here are some common calibration challenges and their possible solutions:
| Calibration Challenge | Possible Solution |
|---|---|
| Uneven Bed Leveling | Check and adjust the bed leveling screws to ensure a uniform distance between the nozzle and the bed across all points. |
| Extruder Steps/mm | Measure the amount of filament being extruded and adjust the steps/mm setting in the firmware accordingly. |
| X/Y/Z Axis Accuracy | Verify that the movement of each axis matches the intended distance by measuring and adjusting the steps/mm setting in the firmware. |
| Extrusion Multiplier | Fine-tune the extrusion multiplier to ensure the correct amount of filament is being deposited. This can be done by printing a calibration cube and measuring its dimensions. |
Bed Adhesion Troubles
Frequently encountered in DIY 3D printing, bed adhesion troubles can hinder the successful completion of prints and require careful troubleshooting to resolve.
Proper bed adhesion is crucial for ensuring that the printed object adheres securely to the print bed throughout the printing process.
Here are three common bed adhesion issues and their potential solutions:
- Warping: Warping occurs when the corners or edges of the printed object curl up or detach from the print bed. This can be caused by uneven cooling or improper bed leveling. To address warping, try using a heated bed or applying a thin layer of adhesive such as hairspray or glue stick to improve adhesion.
- Poor first layer: If the first layer of your print is not sticking properly, it can lead to the entire print failing. This problem may be due to incorrect bed leveling, a dirty or damaged print bed surface, or inadequate bed temperature. Ensure that the print bed is clean and level, and adjust the temperature settings accordingly.
- Filament not sticking: Sometimes, the filament may not adhere to the print bed at all, resulting in a failed print. This can be caused by a low bed temperature, a dirty print bed surface, or improper extrusion settings. Increase the bed temperature, clean the print bed, and adjust the extrusion settings to ensure proper filament adhesion.
Software and Firmware Glitches
When troubleshooting DIY 3D printer issues, it is important to address software and firmware glitches, as they can significantly impact the performance and functionality of the printer. Software and firmware are essential components that control the printer's operations, including movement, temperature regulation, and extrusion. Glitches in these systems can lead to print errors, failed prints, or even damage to the printer itself. Therefore, understanding and resolving software and firmware issues is crucial for a smooth printing experience.
To help you identify and fix common software and firmware glitches, the following table provides some examples of issues and their potential solutions:
| Issue | Potential Solution |
|---|---|
| Print stops mid-way | Check for loose connections between the printer and computer, ensure the software is up to date |
| Incorrect print dimensions | Calibrate the printer's firmware settings, adjust the steps per millimeter values |
| Extruder not heating | Verify the temperature settings in the software, check the connections and functionality of the heating element |
| Printer freezing or crashing | Update the firmware to the latest version, ensure the software is compatible with the printer model |
| Layer shifting or misalignment | Adjust the stepper motor current in the firmware, tighten belts and pulleys, ensure smooth movement of the print head |
Frequently Asked Questions
How Do I Troubleshoot Issues With My 3D Printer's Power Supply?
Troubleshooting issues with a 3D printer's power supply involves a systematic approach to identifying and resolving problems. Analyzing power connections, checking voltage levels, and ensuring proper grounding are essential steps in diagnosing and resolving power-related issues.
What Should I Do if My 3D Printer Is Making Unusual Noises During the Printing Process?
If a 3D printer is making unusual noises during the printing process, it is important to address the issue promptly. The cause of the noise could be a mechanical problem, such as a loose belt or a misaligned part, which should be diagnosed and resolved to ensure optimal printing performance.
How Can I Prevent My 3D Printer From Overheating?
To prevent a 3D printer from overheating, it is crucial to ensure proper ventilation, use a suitable cooling system, monitor the printer's temperature, and avoid running the printer for extended periods without breaks to allow it to cool down.
What Are Some Common Causes of Filament Breakage and How Can I Fix It?
Filament breakage in 3D printers can occur due to various reasons, such as incorrect filament tension, nozzle clogs, or improper feeding mechanisms. To fix it, ensure proper filament tension, clean the nozzle, and check the feeding mechanism for any issues.
How Do I Address Issues With My 3D Printer's Extruder Motor Not Functioning Properly?
To address issues with a 3D printer's extruder motor not functioning properly, it is important to first identify potential causes such as loose connections, faulty wiring, or a malfunctioning motor driver. Troubleshooting steps should then be taken accordingly to rectify the problem.
Conclusion
In conclusion, troubleshooting common issues in DIY 3D printers requires a systematic approach and attention to detail. By addressing print quality issues, filament clogging problems, calibration challenges, bed adhesion troubles, and software and firmware glitches, users can achieve high-quality prints consistently.
Interestingly, according to a survey conducted among DIY 3D printer users, 65% reported encountering print quality issues as their most common problem. This statistic emphasizes the importance of understanding and resolving these issues to ensure optimal printing outcomes.

