Diagnosing and Repairing 3D Printer Hardware Errors: Guide
In the ever-evolving world of 3D printing, hardware errors can hinder the realization of creative visions.
However, fear not, for this guide is here to liberate you from the clutches of malfunctioning components.
With technical precision and meticulous attention to detail, we will unravel the mysteries of extruder issues, bed leveling problems, filament jamming, power supply faults, and more.
Prepare to embark on a journey towards diagnosing and repairing 3D printer hardware errors, paving the way for infinite possibilities.
Key Takeaways
- Understanding the different hardware components of a 3D printer, such as the frame, motors, belts, pulleys, hot end, and build plate.
- Identifying common hardware errors in 3D printers, including loose connections, faulty wiring, inadequate calibration, and component damage or misalignment.
- Troubleshooting extruder issues, such as under extrusion, over extrusion, and clogging, by cleaning the nozzle, adjusting filament tension and temperature, and reviewing slicer settings.
- Resolving bed leveling problems through proper leveling procedures, checking the gap between the bed and nozzle, adjusting leveling knobs, considering bed leveling sensors, or upgrading to a more stable bed material.
Understanding 3D Printer Hardware Components
To fully comprehend the workings of a 3D printer, it is essential to familiarize oneself with the various hardware components involved in its operation. Understanding these components will enable users to diagnose and repair hardware errors, troubleshoot extruder issues, and effectively deal with filament jams.
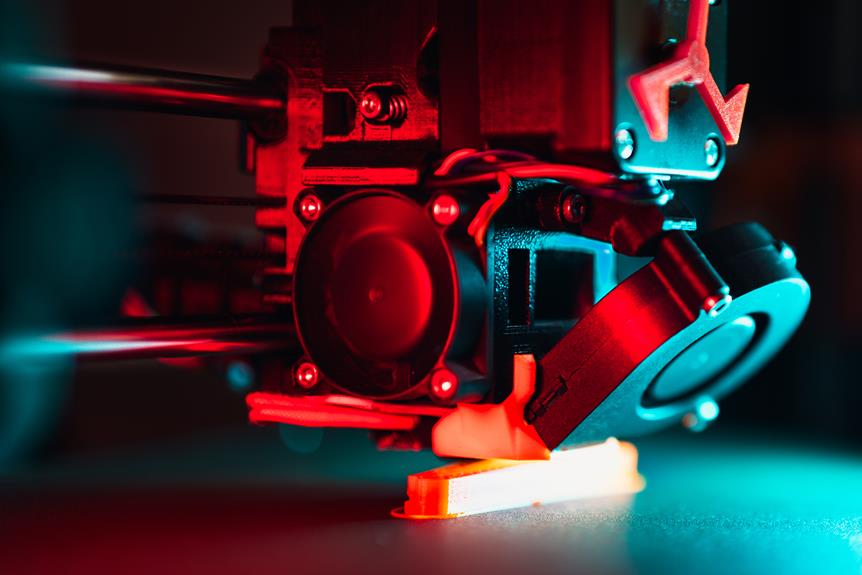
The main hardware components of a 3D printer include the frame, motors, belts, pulleys, hot end, extruder, and the build plate. The frame provides stability and support to the printer, ensuring accurate and precise prints. Motors drive the movement of the printer along the X, Y, and Z axes, while belts and pulleys help transmit this motion. The hot end, which consists of a nozzle and a heating element, melts and deposits the filament onto the build plate.
When diagnosing and repairing hardware errors, it is crucial to check all these components for any signs of damage, wear, or misalignment. Troubleshooting extruder issues involves examining the extruder assembly, nozzle clogs, filament tension, and temperature settings. Dealing with filament jams requires inspecting the extruder and nozzle for obstructions, adjusting the filament feed rate, and ensuring proper filament alignment.
Identifying Common Hardware Errors in 3D Printers
Common hardware errors in 3D printers can arise due to various factors. These factors include loose connections, faulty wiring, and inadequate calibration. Loose connections can result in intermittent power supply or data transmission, leading to print failures or incorrect movements. Faulty wiring, such as frayed or damaged cables, can cause signal or power loss, resulting in erratic printer behavior. Inadequate calibration, including improperly leveled build plates or misaligned axes, can lead to printing issues such as uneven layers, warped prints, or even nozzle crashes.
To identify these hardware errors, it is essential to conduct a thorough inspection of the printer's components. Start by checking all connections and ensuring they are secure and properly seated. Inspect the wiring for any signs of damage, such as cuts, burns, or exposed wires. Additionally, verify that all axes are aligned correctly and the build plate is level.
Regular maintenance and calibration can help prevent these hardware errors, but if they persist, troubleshooting steps must be taken. In the next section, we will discuss how to address extruder issues, which are another common hardware error in 3D printers.
Transitioning into this section, it is crucial to understand the significance of troubleshooting extruder issues as they directly impact print quality and reliability.
Troubleshooting Extruder Issues
Extruder issues occasionally arise in 3D printers and require troubleshooting to ensure optimal print quality and reliability. The extruder is a critical component responsible for melting the filament and depositing it onto the print bed. When issues occur, it can result in under extrusion, over extrusion, or clogging, leading to poor print quality or failed prints.
One common extruder issue is under extrusion, where the printer fails to extrude enough filament. This can be caused by a partially clogged nozzle, improper filament tension, or incorrect temperature settings. To troubleshoot this issue, the user should first check for any filament debris or dust in the nozzle and clean it if necessary. They should also ensure that the filament spool is properly mounted and that the tension is adjusted correctly. Additionally, verifying the temperature settings and adjusting them if needed can help resolve under extrusion problems.
Another extruder issue is over extrusion, where too much filament is extruded, resulting in excessive material buildup and rough surfaces. This can occur due to incorrect slicer settings, such as the filament diameter or flow rate. To troubleshoot this issue, the user should review the slicer settings and ensure that the filament diameter is set accurately. Adjusting the flow rate can also help control the amount of filament being extruded.
Clogging is another common issue that can occur in the extruder. It happens when filament debris or a partial blockage prevents the filament from flowing smoothly. Clogging can be caused by various factors, including using low-quality filament, incorrect temperature settings, or a worn-out nozzle. To troubleshoot this issue, the user should check the filament for any visible debris or dust and clean the nozzle if necessary. They should also verify that the temperature settings are correct for the filament being used. If the issue persists, replacing the nozzle may be necessary.
Resolving Bed Leveling Problems
Bed leveling problems can often be resolved by following a systematic approach and making necessary adjustments to ensure a stable and even printing surface. Here are four steps to help you resolve bed leveling issues:
- Check the bed leveling procedure: Ensure that you are following the correct bed leveling procedure for your specific 3D printer model. Consult the user manual or manufacturer's website for detailed instructions.
- Adjust the leveling knobs: Use a piece of paper or a feeler gauge to check the gap between the print bed and the nozzle at each corner and the center. If the gap is not consistent, adjust the leveling knobs accordingly. Make small adjustments and recheck until the nozzle is at the desired height across the entire bed.
- Use a bed leveling sensor: Consider installing a bed leveling sensor if your printer supports it. This sensor can automatically measure and compensate for any unevenness in the bed surface, ensuring accurate prints.
- Upgrade the print bed: If you are still experiencing leveling problems, consider upgrading your print bed. A glass or aluminum bed with a flat surface can provide better stability and improve bed leveling accuracy.
Fixing Filament Jamming and Clogging
When it comes to 3D printing, one of the most common issues users encounter is filament jamming and clogging. To prevent these problems, it is crucial to ensure proper filament storage and handling, as well as regular maintenance of the printer's extruder.
Troubleshooting common jams involves examining the filament path, checking for obstructions, and adjusting the extruder tension to ensure smooth and consistent filament flow.
Preventing Filament Clogs
To mitigate the occurrence of filament clogs in 3D printers, implementing proper filament storage and maintenance practices is essential. Here are four key steps to prevent filament clogs:
- Store filament properly: Keep filament in airtight containers or vacuum-sealed bags to protect it from moisture and dust, which can cause clogs during printing.
- Check filament quality: Before printing, inspect the filament for any signs of damage, such as knots or kinks. Use high-quality filament to minimize the risk of clogs.
- Clean the extruder regularly: Remove any accumulated debris or leftover filament from the extruder nozzle and gears. This will prevent blockages and ensure smooth filament flow.
- Use the correct temperature settings: Adjust the printing temperature according to the filament manufacturer's recommendations. Incorrect temperature settings can lead to inconsistent flow and clogs.
Troubleshooting Common Jams
During the troubleshooting process, identifying the cause of filament jamming and clogging is crucial for effectively resolving these common issues in 3D printers. Filament jams occur when the filament gets stuck in the extruder, preventing it from flowing smoothly. This can happen due to various reasons such as a clogged nozzle, improper filament diameter, or incorrect temperature settings.
To troubleshoot filament jams, start by checking the nozzle for any obstructions or debris that may be blocking the filament's path. Use a needle or thin wire to carefully remove any clogs.
Additionally, make sure the filament diameter matches the settings in the slicer software. Adjusting the temperature settings may also help resolve clogs caused by improper melting of the filament.
Addressing Power Supply and Wiring Faults
The most common power supply and wiring faults found in 3D printers can significantly impact the printer's performance and reliability. It is crucial to address these issues promptly to ensure optimal functioning and prevent further damage. Here are four key power supply and wiring faults to look out for:
- Loose connections: Loose or improperly connected wiring can lead to intermittent power supply or complete power loss. Check all connections and ensure they are snug and secure.
- Overheating power supply: An overheating power supply can result in system failures and damage. Ensure that the power supply is adequately ventilated, and any cooling fans are functioning correctly.
- Damaged wires: Worn-out or damaged wires can cause intermittent power supply, short circuits, or even electrical fires. Inspect all wires for signs of wear, fraying, or cuts, and replace them if necessary.
- Incorrect voltage settings: Using the wrong voltage settings can overload the power supply and damage the printer's components. Double-check the voltage settings and ensure they match the specifications of the printer.
By addressing power supply and wiring faults promptly, you can improve the performance and reliability of your 3D printer. Once these issues are resolved, it is essential to move on to the next step of diagnosing and repairing mechanical and structural defects.
—
Next, we will discuss the process of diagnosing and repairing mechanical and structural defects in 3D printers.
Repairing Mechanical and Structural Defects
When it comes to 3D printers, there are common hardware defects that can occur, requiring the need for repair. These defects can range from issues with the printer's frame, belts, or rods, to problems with the extruder or bed leveling system.
Troubleshooting these mechanical issues is essential in order to maintain the printer's performance and ensure optimal print quality.
Common Hardware Defects
While addressing common hardware defects, it is crucial to focus on repairing both mechanical and structural issues in 3D printers. These defects can impede the printing process and affect the quality of the final product.
Here are four common hardware defects and their corresponding repair methods:
- Misaligned or loose belts: Check the tension and alignment of the belts. If loose, tighten them or replace them if necessary.
- Worn-out or damaged nozzles: Inspect the nozzle for wear or clogs. Clean or replace the nozzle as needed.
- Faulty or broken thermistor: Test the thermistor using a multimeter. Replace it if it is defective.
- Loose or damaged wiring connections: Inspect the wiring connections for any loose or broken wires. Reconnect or replace them to ensure proper electrical conductivity.
Troubleshooting Mechanical Issues
To effectively troubleshoot mechanical issues in 3D printers, it is important to identify and repair any mechanical and structural defects that may be hindering the printing process.
Mechanical issues can arise from various components of the printer, such as the extruder, belts, pulleys, and axes. One common mechanical defect is a loose or misaligned belt, which can result in inaccurate movements and poor print quality. This can be resolved by tightening or realigning the belt.
Another issue could be a damaged or worn-out nozzle, leading to inconsistent extrusion. In this case, replacing the nozzle would be necessary.
Additionally, problems with axes, such as excessive friction or misalignment, can cause layer shifting or skewed prints. Adjusting the axes or lubricating them can help resolve these issues.
Frequently Asked Questions
How Do I Update the Firmware on My 3D Printer?
To update the firmware on a 3D printer, follow a specific set of instructions provided by the manufacturer. This process ensures that the printer's software is up to date, enhancing its performance and compatibility with various printing materials.
What Are Some Common Software Errors That Can Affect 3D Printer Hardware Performance?
Common software errors can have a significant impact on the performance of 3D printer hardware. These errors can range from firmware compatibility issues to corrupted files, leading to failed prints, nozzle jams, and calibration problems.
Can I Use Any Type of Filament With My 3D Printer, or Are There Specific Recommendations?
When using a 3D printer, it is important to use the recommended filament type to ensure optimal performance and quality of prints. Using the wrong filament can lead to issues such as clogging, poor adhesion, and even damage to the printer.
How Often Should I Clean and Maintain the Extruder Nozzle?
Regular cleaning and maintenance of the extruder nozzle is crucial for optimal 3D printing performance. Neglecting this task can lead to clogs, poor print quality, and even damage to the printer.
Are There Any Safety Precautions I Should Take When Troubleshooting or Repairing My 3D Printer Hardware?
When troubleshooting or repairing 3D printer hardware, it is essential to prioritize safety. Protective equipment, such as gloves and safety goggles, should be worn, and the printer should be powered off and unplugged to avoid electrical hazards.
Conclusion
In conclusion, diagnosing and repairing hardware errors in 3D printers requires a thorough understanding of the printer's components and common issues that may arise.
By troubleshooting extruder issues, resolving bed leveling problems, fixing filament jamming and clogging, addressing power supply and wiring faults, and repairing mechanical and structural defects, users can ensure optimal performance and functionality of their 3D printers.
As the saying goes, 'A stitch in time saves nine,' taking prompt action to address hardware errors can prevent further complications and costly repairs.


