Upgrading a DIY 3D Printer: Enhance Performance and Functionality
In the realm of do-it-yourself 3D printing, the pursuit of enhanced performance and functionality is an ongoing endeavor. As technology advances, so too does the opportunity to elevate one's creations to new heights.
This article delves into the intricacies of upgrading a DIY 3D printer, offering technical insights and precise details to empower the audience in their quest for liberation through innovation.
From extruder systems to advanced features, this comprehensive guide will pave the way for a more impressive 3D printing journey.
Key Takeaways
- Upgrading the extruder system with a higher quality nozzle improves print quality, precision, and expands the range of printable materials.
- Enhancing print bed stability through upgrades such as a rigid build plate, heated bed, and dual Z-axis system improves print quality and accuracy.
- Filament upgrades, including using premium filament and optimizing temperature control techniques, result in better adhesion, smoother surfaces, and consistent prints.
- Upgrading electronics and firmware improves print quality, stability, and provides bug fixes and security updates.
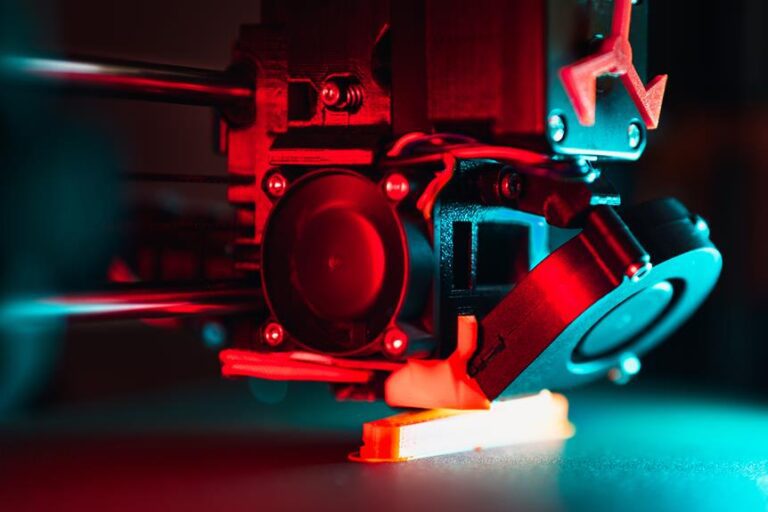
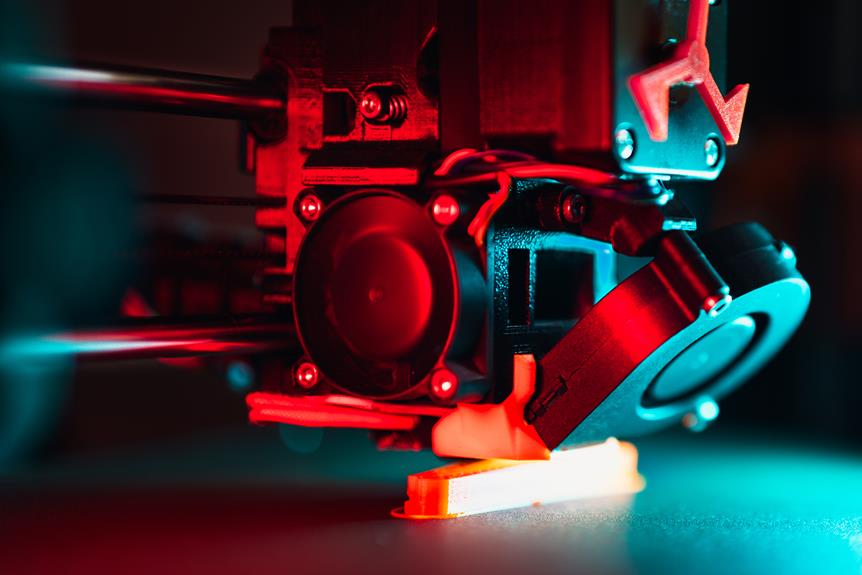
Upgrading the Extruder System
One of the key steps in upgrading the extruder system of a DIY 3D printer is to replace the stock nozzle with a higher quality one. This modification is essential for achieving better print quality and precision. The stock nozzle that comes with most DIY 3D printers is usually made of brass, which can limit the types of materials that can be used and may not provide optimal heat conductivity.
By upgrading to a higher quality nozzle, such as one made of stainless steel or hardened steel, users can expand the range of materials that can be printed and improve overall print performance.
DIY printer modifications and upgrades are crucial for enhancing the functionality of the 3D printer. The nozzle is an integral part of the extruder system, responsible for melting and depositing the filament onto the build plate. A higher quality nozzle can provide better heat distribution, resulting in improved layer adhesion and finer details in the printed object.
When considering a nozzle upgrade, it is important to choose the appropriate size for the desired print resolution and material compatibility. Nozzles are available in various diameters, typically ranging from 0.2mm to 1mm. Smaller nozzles allow for finer details, while larger nozzles enable faster printing but sacrifice detail.
Enhancing Print Bed Stability
To improve the overall print quality and minimize the risk of print failures, it is essential to reinforce the print bed stability of a DIY 3D printer. The print bed is the platform on which the object being printed is built. A stable print bed ensures that the object is accurately and consistently formed, eliminating any potential distortions or misalignments during the printing process.
One way to enhance print bed stability is by upgrading the build plate. The build plate is the surface on which the print bed is mounted. It is important to choose a build plate material that is rigid and flat, such as glass or aluminum, to provide a solid foundation for the print bed. Additionally, adding a heated bed can help to prevent warping of the build plate, especially when working with materials that require higher printing temperatures.
Another method to enhance print bed stability is by installing a dual Z-axis system. This system utilizes two motors and lead screws to drive the movement of the print bed, ensuring that it remains level and stable throughout the printing process. Upgrading to a dual Z-axis system can help to eliminate any potential wobbling or tilting of the print bed, resulting in improved print quality and accuracy.
Improving Print Quality With Filament Upgrades
When it comes to improving print quality with filament upgrades, there are several key points to consider.
Firstly, using premium filament can greatly enhance the overall print quality by providing better adhesion, smoother surfaces, and more consistent filament diameter.
Secondly, implementing temperature control techniques, such as adjusting the nozzle and bed temperatures, can help optimize the print quality by preventing issues like warping and stringing.
Lastly, optimizing print speed can also contribute to better print quality, as higher speeds may result in reduced detail and accuracy, while slower speeds can achieve finer details but may increase print time.
Premium Filament Benefits
Using high-quality filament in a DIY 3D printer can significantly enhance the print quality and overall performance of the machine. Premium filaments offer numerous benefits that can improve the final output of 3D prints.
Firstly, premium filaments are manufactured with higher precision, ensuring consistent diameter and improved flow characteristics. This leads to more accurate and detailed prints with fewer imperfections.
Additionally, premium filaments are made from high-quality materials that exhibit superior mechanical properties, such as increased strength, flexibility, and heat resistance. This allows for the creation of more durable and functional prints.
Moreover, premium filaments often have a wider range of vibrant colors and finishes, enabling users to produce visually stunning prints.
Temperature Control Techniques
Implementing effective temperature control techniques is crucial for improving print quality when using filament upgrades in a DIY 3D printer. Here are four key strategies to enhance temperature control and achieve better results:
- Calibration: Begin by calibrating the printer's hot end to ensure accurate temperature readings. This involves adjusting the temperature sensor and fine-tuning the firmware settings to match the actual temperature.
- PID Tuning: Perform a PID (Proportional-Integral-Derivative) tuning to optimize the hot end's temperature stability. By adjusting the PID values, you can minimize temperature fluctuations and achieve more precise control.
- Insulation: Insulating the hot end and heated bed with materials like silicone socks or thermal tape can help maintain a consistent temperature and reduce heat loss. This avoids external factors affecting the print quality.
- Fan Control: Properly managing the cooling fan speeds during the printing process is crucial. Adjusting the fan speed can prevent overheating or warping, ensuring that the printed layers adhere properly and reducing the risk of defects.
Print Speed Optimization
To achieve better print quality with filament upgrades, it is essential to optimize print speed and enhance functionality.
Print speed optimization plays a crucial role in improving the overall performance of a DIY 3D printer. By finding the optimal balance between speed and quality, users can achieve faster print times without sacrificing the final output.
One way to achieve this is by upgrading the filament used in the printing process. High-quality filaments with improved flow characteristics and reduced friction can allow for faster extrusion rates without compromising the print quality.
Additionally, filament upgrades can enhance functionality by providing better adhesion to the build plate, reducing warping and improving overall print stability.
These upgrades not only result in faster print times but also lead to higher-quality prints with improved precision and detail.
Optimizing Cooling and Ventilation
Maximizing the airflow within the DIY 3D printer can significantly improve its cooling and ventilation capabilities. To optimize the cooling and ventilation of a DIY 3D printer, consider the following:
- Install additional cooling fans: Adding more fans can enhance airflow by increasing the circulation of cool air around the printer's components. Strategically placing fans near the hot end, heated bed, and electronics can effectively dissipate heat and prevent overheating.
- Upgrade the hot end cooling system: Upgrading to a more efficient hot end cooling system, such as a radial fan or a dual-fan setup, can enhance the cooling of the printed object. These systems provide focused cooling on the filament as it exits the nozzle, reducing the risk of warping and improving print quality.
- Implement an enclosure: Building an enclosure around the printer can help control the airflow and temperature within the printing area. By enclosing the printer, heat is retained, which can prevent temperature fluctuations and improve print consistency.
- Use heat sinks and thermal insulation: Applying heat sinks to components that generate heat, such as the stepper motors or the extruder, can help dissipate heat more efficiently. Additionally, using thermal insulation materials like silicone socks or insulation tape can prevent heat transfer to other parts of the printer, keeping them at a stable temperature.
Upgrading Electronics and Firmware
Upgrading the electronics and firmware of a DIY 3D printer can significantly enhance its performance and functionality.
When considering firmware compatibility, it is crucial to choose a firmware that is compatible with the printer's hardware and offers benefits such as improved print quality and advanced features.
Additionally, there are various options for upgrading the electronics, including replacing the mainboard, adding additional stepper drivers, or installing a more powerful power supply to support higher voltage requirements.
Firmware Compatibility and Benefits
The firmware compatibility of a DIY 3D printer is crucial for ensuring optimal performance and unlocking additional functionality. Upgrading the firmware can bring a range of benefits to your printer, allowing you to take full advantage of its capabilities.
Here are four key benefits of firmware compatibility:
- Improved Stability: By upgrading the firmware, you can enhance the stability of your 3D printer, reducing the chances of errors or failures during the printing process.
- Enhanced Feature Set: Upgrading the firmware can unlock new features and functionalities that may not be available in the original firmware version. This can include improved print quality, advanced calibration options, or compatibility with different materials.
- Better Performance: Firmware upgrades often come with performance improvements, such as faster print speeds, smoother movements, and more precise positioning. These enhancements can significantly enhance the overall printing experience.
- Bug Fixes and Security Updates: Firmware updates often address known bugs and vulnerabilities, providing a more secure and reliable printing environment. Regularly updating your firmware ensures that you are benefiting from the latest bug fixes and security patches.
Electronics Upgrade Options
By improving the electronics and upgrading the firmware, you can enhance the overall performance and functionality of your DIY 3D printer.
Upgrading the electronics of your printer can involve replacing the existing controller board with a more advanced one that offers better features and capabilities. For example, you can opt for a board that supports higher stepper motor resolutions, faster communication protocols, and additional expansion ports for future upgrades.
Additionally, upgrading the firmware allows you to take advantage of the latest software enhancements and bug fixes. This can result in improved print quality, faster printing speeds, and better overall stability of your printer.
It is important to research and choose electronics and firmware upgrades that are compatible with your specific printer model to ensure a seamless integration and optimal performance.
Enhancing the Printer's Power Supply
To optimize the performance and functionality of your DIY 3D printer, it is essential to augment the power supply. Upgrading the power supply can provide a stable and reliable source of power, ensuring smooth and uninterrupted operation.
Here are four ways to enhance your printer's power supply:
- Increase wattage: Consider upgrading to a power supply with a higher wattage rating. This will provide more power to your printer, allowing it to handle larger and more complex prints without straining the power supply.
- Upgrade to a regulated power supply: A regulated power supply ensures a consistent voltage output, reducing the risk of voltage fluctuations that could damage your printer's components. Look for a power supply with built-in voltage regulation to ensure stable and reliable performance.
- Install a power conditioner: Power conditioners are designed to filter out electrical noise and fluctuations, providing a clean and stable power supply. This can help prevent issues such as print artifacts and motor skipping caused by electrical interference.
- Add redundant power supplies: For added reliability, consider installing redundant power supplies. This means having two or more power supplies connected to your printer, so if one fails, the other(s) can take over and keep your printer operational.
Adding Advanced Features and Functionality
Incorporating advanced features and functionality can exponentially expand the capabilities of your DIY 3D printer. By adding advanced features, you can enhance the precision, speed, and versatility of your printer, allowing you to create more complex and intricate designs.
One advanced feature you can consider is a dual extruder system, which enables you to print with multiple materials or colors simultaneously. This feature is particularly useful for creating models with intricate details or for producing objects that require different materials for different parts.
Additionally, adding a heated bed to your printer can improve adhesion and reduce warping, resulting in better print quality. Another advanced feature is the inclusion of an automatic bed leveling system, which ensures that the print bed is perfectly level before each print, eliminating the need for manual adjustments. This feature is especially beneficial for beginners or those who frequently change the print bed.
Furthermore, implementing a touchscreen interface can provide a more intuitive and user-friendly experience, allowing you to easily navigate through menus and adjust settings.
These advanced features and functionalities can greatly enhance your DIY 3D printer, providing you with more freedom and flexibility in your printing endeavors.
Frequently Asked Questions
How Do I Adjust the Tension on the Extruder System?
To adjust the tension on the extruder system, locate the tension adjustment screws or mechanisms on your DIY 3D printer. Carefully turn these screws or adjust the mechanisms to increase or decrease the tension, ensuring proper feeding of filament during printing.
What Are Some Common Problems That Can Occur With Print Bed Stability?
Common problems with print bed stability include uneven heating, warping, and poor adhesion. These issues can result in failed prints, inaccurate dimensions, and inconsistent layer adhesion. Proper leveling, bed material selection, and temperature management can help mitigate these problems.
Can I Use Any Type of Filament With My Upgraded Printer?
Yes, it is possible to use various types of filament with an upgraded 3D printer, provided that the printer's specifications and capabilities are compatible with the particular type of filament being used.
How Can I Prevent Overheating and Improve Cooling in My Printer?
To prevent overheating and improve cooling in a printer, it is essential to ensure proper airflow and ventilation within the printer's enclosure. This can be achieved by installing additional cooling fans and optimizing their placement for efficient heat dissipation.
Is It Necessary to Upgrade the Printer's Power Supply for Better Performance?
Upgrading the power supply of a DIY 3D printer can significantly improve its overall performance and functionality. A higher wattage power supply can provide more stable and reliable power, ensuring smooth operation and preventing potential issues caused by insufficient power.
Conclusion
In conclusion, upgrading a DIY 3D printer can greatly enhance its performance and functionality. By improving the extruder system, print bed stability, print quality with filament upgrades, cooling and ventilation, electronics and firmware, power supply, and adding advanced features, users can achieve superior printing results.
Upgrading the extruder system is essential for better filament control and improved print precision. By investing in a high-quality extruder, users can achieve smoother and more consistent extrusion, reducing the risk of clogs and improving overall print quality.
Print bed stability is another crucial factor in obtaining accurate prints. Upgrading the printer's bed with a sturdier and more level surface can minimize warping and ensure proper adhesion of the printed object to the bed. This step is especially important for larger or complex prints that require a solid foundation.
To further enhance print quality, users can consider upgrading their filament. High-quality filaments with advanced properties such as improved strength, flexibility, or heat resistance can significantly impact the final print's performance and durability.
Cooling and ventilation play a crucial role in preventing overheating and ensuring proper layer cooling. Upgrading the printer's cooling system, such as adding additional fans or improving their positioning, can help in achieving better print quality, especially for prints with overhangs or intricate details.
Upgrading the electronics and firmware can provide users with additional features and improved functionality. This can include upgrading the printer's motherboard, adding a touchscreen interface, or installing firmware updates that optimize print settings and control.
A reliable power supply is essential for consistent and uninterrupted printing. Upgrading to a higher wattage and more stable power supply can prevent unexpected shutdowns and ensure a steady flow of power to the printer's components.
Lastly, adding advanced features to the printer, such as automatic bed leveling, filament run-out sensors, or remote monitoring capabilities, can further enhance the user experience and convenience.
As the saying goes, "A well-equipped printer is a creator's best friend," and with these upgrades, users can unlock the full potential of their DIY 3D printer.