Build Surfaces and Print Beds for 3D Printers: A Comprehensive Guide
In the realm of 3D printing, the foundation upon which successful creations are built often goes overlooked. The build surfaces and print beds of 3D printers play a critical role in achieving optimal print quality and adhesion.
This comprehensive guide aims to enlighten enthusiasts and professionals alike on the importance of selecting the right materials, preparing and leveling the print bed, and exploring alternative options.
By understanding these elements, one can unlock the true potential of their 3D printer and unleash their creative liberation.
Key Takeaways
- The choice of build surface is crucial for successful and high-quality 3D prints.
- Different types of build surfaces, such as glass, PEI sheets, BuildTak, and flexible build surfaces, offer various benefits and considerations.
- The right material for the print bed should provide secure adhesion, durability, and the appropriate surface texture.
- Surface texture plays a significant role in achieving optimal print quality, with smooth surfaces like glass and textured surfaces like PEI or BuildTak offering different advantages.
The Importance of Build Surfaces and Print Beds
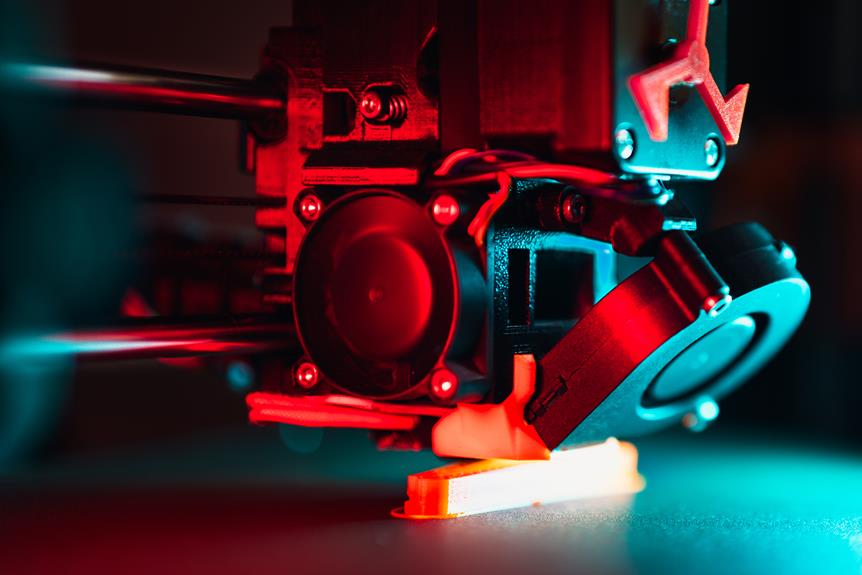
One of the most crucial aspects of 3D printing is the selection and maintenance of build surfaces and print beds. These components play a vital role in ensuring successful and high-quality prints. Build surfaces, also known as print beds, are the foundation upon which objects are created layer by layer. They provide a flat and stable surface for the filament to adhere to during the printing process.
Choosing the right build surface is essential for achieving optimal adhesion and preventing warping or lifting of the printed object. Various options are available, including glass, PEI sheets, and specialized build surfaces like BuildTak. Each material has its advantages and disadvantages, so it is important to consider factors such as print bed temperature, filament type, and personal preferences.
In addition to selecting the appropriate build surface, maintaining it is equally important. Regular cleaning and leveling of the print bed ensure consistent and accurate prints. It is also essential to keep the print bed free from debris, dust, and residue to prevent any interference with the adhesion process.
Furthermore, using a 3D printer enclosure can contribute to noise reduction and temperature control, resulting in improved print quality. Enclosures provide a controlled environment, reducing the impact of external factors such as drafts or fluctuations in room temperature.
To maintain build surfaces and print beds effectively, certain tools are essential. These tools may include a scraper or spatula for removing prints, a leveling tool for precise bed leveling, and cleaning materials such as isopropyl alcohol or specialized cleaning solutions.
Understanding Different Types of Build Surfaces
There are several types of build surfaces available for 3D printers, each with its own unique characteristics and advantages. These surfaces play a crucial role in ensuring successful and high-quality prints.
Here are some of the most commonly used build surfaces:
- Glass beds: Glass beds offer a smooth and flat surface, which helps in achieving accurate prints. They are often coated with materials like borosilicate glass or tempered glass to enhance adhesion. Glass beds provide excellent heat distribution and are easy to clean, making them a popular choice among 3D printing enthusiasts.
- PEI sheets: Polyetherimide (PEI) sheets are known for their exceptional adhesion properties. They have a textured surface that promotes better filament grip, resulting in improved print quality. PEI sheets are also resistant to high temperatures and can withstand repeated use without losing their adhesive properties.
- BuildTak: BuildTak is a popular build surface that offers a strong hold on prints. It is made from a durable plastic material and has a textured surface that provides excellent adhesion. BuildTak is easy to install and remove, making it convenient for users.
- Flexible build surfaces: Flexible build surfaces, such as magnetic build plates with removable and flexible surfaces, are gaining popularity. These surfaces allow for easy removal of prints by flexing the plate, reducing the risk of damaging the print or the build surface.
Understanding the different types of build surfaces is essential in choosing the right material for your print bed. This knowledge will help you achieve optimal print results and ensure a successful 3D printing experience.
Choosing the Right Material for Your Print Bed
When choosing the right material for your 3D printer's print bed, there are several important considerations to keep in mind.
One of the key factors to consider is adhesion, as the material should provide a surface that allows the printed object to stick securely during the printing process.
Additionally, durability is crucial to ensure that the print bed can withstand repeated use without warping or deforming.
Lastly, the surface texture of the material can have a significant impact on the quality of the print, so it is important to choose a material that provides the desired level of smoothness or texture for your specific printing needs.
Material Considerations: Adhesion, Durability
To ensure optimal adhesion and durability of your 3D prints, it is crucial to carefully select the appropriate material for your print bed. Consider the following factors when choosing the right material:
- Temperature resistance: Look for materials that can withstand the heat generated during the printing process without warping or deforming.
- Chemical resistance: Certain materials may be more resistant to chemicals used in post-processing or cleaning, ensuring longevity of the print bed.
- Surface texture: The texture of the print bed can impact adhesion. Smooth surfaces are ideal for materials that require strong bonding, while textured surfaces provide better adhesion for materials that tend to warp.
- Cost and availability: Evaluate the cost and availability of different materials to find the most suitable option for your budget and location.
Considering these factors will help you choose the right material for your print bed, ensuring successful prints and efficient use of resources.
Now let's explore how surface texture impacts printing.
Surface Texture Impacts Printing
The choice of material for your print bed significantly affects the printing process, with surface texture playing a crucial role in achieving successful and high-quality prints. The surface texture of the print bed determines how well the printed object adheres to it, as well as the overall finish of the print.
Smooth surfaces, such as glass or acrylic, provide a flat and uniform base that can yield excellent print results. However, certain materials, like PLA, may require the use of adhesives or print surface treatments to improve adhesion.
On the other hand, textured surfaces, such as PEI or BuildTak, offer enhanced grip and adhesion for materials like ABS, reducing the need for additional adhesives. Understanding the impact of surface texture on your print bed is essential for achieving optimal print quality.
In the subsequent section, we will discuss some tips for preparing and leveling your print bed to ensure successful prints.
Tips for Preparing and Leveling Your Print Bed
One crucial tip for preparing and leveling your print bed is to thoroughly clean it before starting the printing process. A clean print bed ensures proper adhesion and prevents any debris or contamination from interfering with the print.
Here are some additional tips to help you prepare and level your print bed effectively:
- Use a leveling tool: Invest in a reliable leveling tool to ensure that your print bed is perfectly level. This will help prevent any issues with print quality and adhesion.
- Follow the manufacturer's instructions: Different printers may have specific instructions for leveling the print bed. It is important to carefully read and follow these instructions to ensure optimal printing results.
- Check the print bed temperature: Before starting a print, check that the print bed is at the correct temperature for the filament you are using. This will help ensure proper adhesion and prevent warping or lifting during the print.
- Perform regular maintenance: Regularly inspect your print bed for any signs of wear or damage. Replace any damaged parts to maintain a level and smooth printing surface.
Optimizing Adhesion With Surface Treatments
Enhancing adhesion through surface treatments is essential for achieving optimal print quality and minimizing the risk of print failures. Surface treatments can significantly improve the bond between the print bed and the printed object, ensuring that it stays firmly in place during the printing process.
One common surface treatment is applying adhesive materials such as glue sticks or hairspray to the print bed. These materials create a thin layer of stickiness that helps the printed object adhere to the bed. Another popular option is using a specialized 3D printing tape, which provides a textured surface that promotes adhesion.
In addition to adhesive treatments, there are other surface treatments that can enhance adhesion. One example is applying a thin layer of a solution called sodium hydroxide (NaOH) to the print bed. This treatment creates microscopically roughened surfaces that improve the contact between the bed and the printed object.
It is important to note that different types of filaments may require different surface treatments. For example, ABS filament tends to adhere well to a heated glass bed, while PLA filament may require additional treatments like adhesive materials or specialized tapes.
By optimizing adhesion through surface treatments, 3D printer users can ensure better print quality and reduce the chances of print failures.
However, in some cases, despite applying surface treatments, adhesion issues may still arise. In the next section, we will discuss common troubleshooting techniques for addressing these issues and achieving successful prints.
Troubleshooting Common Adhesion Issues
To address common adhesion issues, filament type and print bed temperature should be carefully evaluated and adjusted accordingly. Here are some troubleshooting tips to help improve adhesion:
- Filament choice: Consider using filaments with better adhesion properties, such as PLA or ABS. These materials generally adhere well to various print bed surfaces and are commonly used in 3D printing.
- Bed temperature: Adjusting the print bed temperature can greatly impact adhesion. If the filament is not sticking properly, try increasing the bed temperature slightly. Conversely, if the filament is warping or curling, lowering the bed temperature may help.
- Clean the print bed: Ensure that the print bed is clean and free from any debris or residue. Regularly wipe the bed with isopropyl alcohol or a similar cleaning agent to remove any oils or contaminants that may affect adhesion.
- Use adhesion aids: In some cases, using adhesion aids like glue sticks, hairspray, or specialized 3D printing adhesives can improve bed adhesion. Apply a thin layer of the chosen adhesive to the print bed before starting the print.
Exploring Alternative Print Bed Options
The use of a different print bed material can offer a potential solution for improving adhesion and achieving better print results. While traditional print bed materials such as glass or aluminum can work well for many applications, they may not always provide the desired level of adhesion or surface finish. In such cases, exploring alternative print bed options can be beneficial.
One alternative option is a magnetic print bed. This type of print bed consists of a flexible magnetic sheet that can be attached to the printer's build plate. The advantage of a magnetic print bed is its flexibility, which allows for easy removal of printed objects without the need for scraping or prying. It also provides good adhesion during the printing process, ensuring that the model stays in place.
Another alternative is a PEI (Polyetherimide) print bed. PEI is a heat-resistant plastic that offers excellent adhesion properties. It provides a smooth surface finish and is highly resistant to warping or deformation. PEI print beds are often used in industrial-grade 3D printers due to their reliability and durability.
In conclusion, exploring alternative print bed options can be a valuable step in improving print results. Whether it's using a magnetic print bed for easy removal or a PEI print bed for enhanced adhesion and surface finish, choosing the right material can make a significant difference in the overall printing experience.
Now, let's move on to the next section and discuss how to maintain and clean your print bed.
Maintaining and Cleaning Your Print Bed
Regularly cleaning and maintaining your print bed is essential for ensuring optimal print quality and prolonging the lifespan of your 3D printer.
Here are some important steps to follow when maintaining and cleaning your print bed:
- Remove the print bed: Start by removing the print bed from your 3D printer. This will allow you to clean it more effectively and prevent any damage to the printer itself.
- Wipe with a soft cloth: Use a soft cloth or sponge to gently wipe the print bed. Avoid using abrasive materials or harsh chemicals that could damage the surface.
- Remove residue: If there is any residue or stuck filament on the print bed, you can use a scraper or spatula to carefully remove it. Be cautious not to scratch or gouge the surface.
- Apply adhesive if necessary: Depending on the type of print bed surface you have, you may need to reapply adhesive. This will help ensure proper adhesion of your prints.
By regularly cleaning and maintaining your print bed, you can prevent debris buildup, improve print adhesion, and extend the lifespan of your 3D printer.
Now, let's explore how you can enhance print quality with advanced bed leveling techniques.
Enhancing Print Quality With Advanced Bed Leveling Techniques
When it comes to enhancing print quality in 3D printers, two key techniques are often employed: auto bed leveling and manual bed adjustments.
Auto bed leveling utilizes sensors to automatically adjust the bed height, ensuring a consistent and level printing surface.
On the other hand, manual bed adjustments require the user to manually adjust the bed to achieve the desired level of precision.
Both techniques play a crucial role in improving print quality and ensuring successful 3D prints.
Auto Bed Leveling
One of the key advantages of implementing auto bed leveling is its ability to enhance print quality through the use of advanced bed leveling techniques. This technology ensures that the print bed is perfectly leveled, resulting in improved first layer adhesion and overall print accuracy.
Here are some ways auto bed leveling enhances print quality:
- Eliminates human error: Auto bed leveling eliminates the need for manual bed adjustments, reducing the chances of human errors and inconsistencies.
- Compensates for uneven surfaces: Advanced bed leveling techniques allow the printer to compensate for uneven or warped print beds, ensuring consistent print quality across the entire build area.
- Saves time and effort: With auto bed leveling, there's no need to spend time manually leveling the bed before each print, saving valuable time and effort.
- Improves print reliability: By maintaining a consistent and level print bed, auto bed leveling improves print reliability and reduces the risk of failed prints.
With auto bed leveling optimizing print quality, let's now explore the importance of manual bed adjustments in the next section.
Manual Bed Adjustments
To achieve optimal print quality, it is essential to understand and implement advanced bed leveling techniques through manual bed adjustments. While auto bed leveling is convenient, manual adjustments provide greater control and precision.
Manual bed adjustments involve fine-tuning the bed's leveling by manually adjusting the screws or knobs on the printer's bed. This process ensures that the printing surface is perfectly aligned with the printer's nozzle, allowing for even and consistent layer deposition.
By manually adjusting the bed, users can compensate for any imperfections or irregularities in the print bed, resulting in improved adhesion and print quality. Manual bed adjustments require patience and attention to detail, but the effort is rewarded with better prints.
In the next section, we will explore the future trends in build surfaces and print beds for 3D printers.
Future Trends in Build Surfaces and Print Beds for 3D Printers
With advancements in technology and materials, build surfaces and print beds for 3D printers are evolving to enhance print quality and efficiency. As researchers and manufacturers continue to push the boundaries of innovation, several future trends are emerging in this field:
- Flexible Build Surfaces: Flexible materials such as polyetherimide (PEI) sheets and magnetic build plates are gaining popularity. These surfaces allow for easy removal of prints, reducing the risk of damage and improving overall user experience.
- Self-Leveling Print Beds: Automatic bed leveling systems are becoming more common, eliminating the need for manual adjustments. These systems use sensors to measure the distance between the nozzle and the bed, ensuring a level printing surface for improved print quality.
- Heated Print Beds: Heated print beds are essential for printing certain materials like ABS and nylon. Future trends include more advanced heating systems with precise temperature control, reducing warping and promoting better adhesion.
- Multi-Zone Print Beds: Print beds with multiple heating zones are being developed to accommodate printing different materials simultaneously. This allows for increased efficiency and flexibility in the printing process.
As the 3D printing industry continues to evolve, these future trends in build surfaces and print beds will contribute to unlocking new possibilities and pushing the boundaries of what can be achieved with this technology.
Frequently Asked Questions
What Are the Common Issues Faced When Using Build Surfaces and Print Beds for 3D Printers?
Common issues when using build surfaces and print beds for 3D printers include adhesion problems, warping, uneven print surfaces, and residue buildup. These challenges can impact print quality and require careful calibration and maintenance for optimal performance.
Can I Use Any Material for My Print Bed, or Are There Specific Materials That Work Best?
Using the correct material for your print bed is crucial for successful 3D printing. While some materials may work, specific materials like glass or specialized build surfaces are recommended for optimal adhesion, heat distribution, and print quality.
How Often Should I Clean and Maintain My Print Bed for Optimal Performance?
For optimal performance, it is recommended to clean and maintain your 3D printer's print bed regularly. This ensures proper adhesion and prevents issues such as warping or failed prints. Frequency may vary depending on usage, but a weekly or bi-weekly cleaning is generally sufficient.
Are There Any Alternative Options to Traditional Build Surfaces and Print Beds?
Yes, there are alternative options to traditional build surfaces and print beds for 3D printers. These alternatives include glass plates, PEI sheets, magnetic build plates, and flexible build surfaces, each with their own advantages and limitations.
What Are Some Advanced Bed Leveling Techniques That Can Enhance Print Quality?
Advanced bed leveling techniques, when employed correctly, can significantly enhance the print quality of 3D printers. These techniques involve meticulous calibration and adjustment of the print bed to ensure optimal adhesion and uniformity, resulting in superior print outcomes.
Conclusion
In conclusion, build surfaces and print beds play a crucial role in ensuring successful 3D printing outcomes. Choosing the right material, preparing and leveling the print bed, and optimizing adhesion through surface treatments are essential steps for achieving high-quality prints.
It is fascinating to note that according to a study, proper bed leveling can increase print success rate by up to 80%, emphasizing the importance of this aspect in the 3D printing process.
