DIY SLA 3D Printer Projects: An Adventure in Resin Printing
Embark on a thrilling journey into the world of resin printing with our comprehensive guide to DIY SLA 3D printer projects.
This article will serve as your compass, providing you with the knowledge and tools necessary to navigate the intricate terrain of resin printing.
From choosing the perfect SLA printer to troubleshooting common issues, we will equip you with the expertise needed to unleash your creativity and achieve stunning results.
Get ready to unlock a new realm of artistic possibilities and liberate your imagination.
Key Takeaways
- Consider the size of the objects you plan to print.
- Evaluate the resolution and accuracy of the printer.
- Ensure compatibility with various resins.
- Look for reputable brands with good customer reviews.

Choosing the Right SLA 3D Printer for Your DIY Project
When embarking on a DIY project, it is crucial to select an SLA 3D printer that meets your specific requirements. DIY SLA 3D printer projects involve using resin to create highly detailed and intricate models, making it essential to choose the right printer for optimal results.
When choosing an SLA 3D printer for your DIY project, there are a few key factors to consider. Firstly, you need to determine the size of the objects you plan to print. Some printers have smaller build volumes, limiting the size of the models you can create. Additionally, consider the resolution and accuracy of the printer. Higher resolution printers can produce finer details, resulting in more precise and visually appealing prints.
Another important consideration is the printer's compatibility with various resins. Different resins have different properties and curing times, so it is crucial to select a printer that can handle the specific resin you want to use for your DIY project.
Furthermore, take into account the reliability and durability of the printer. Look for reputable brands with good customer reviews to ensure that you invest in a printer that will last and provide consistent performance throughout your DIY printing journey.
Understanding the Basics of Resin Printing
To gain a comprehensive understanding of resin printing, it is important to familiarize oneself with the fundamental principles and techniques involved. Resin printing projects involve using a liquid photopolymer resin that is cured by a light source to create highly detailed 3D prints. The process starts with the design of the object using CAD software. Once the design is complete, it is transferred to a slicer software that prepares the model for printing by generating support structures and slicing it into layers.
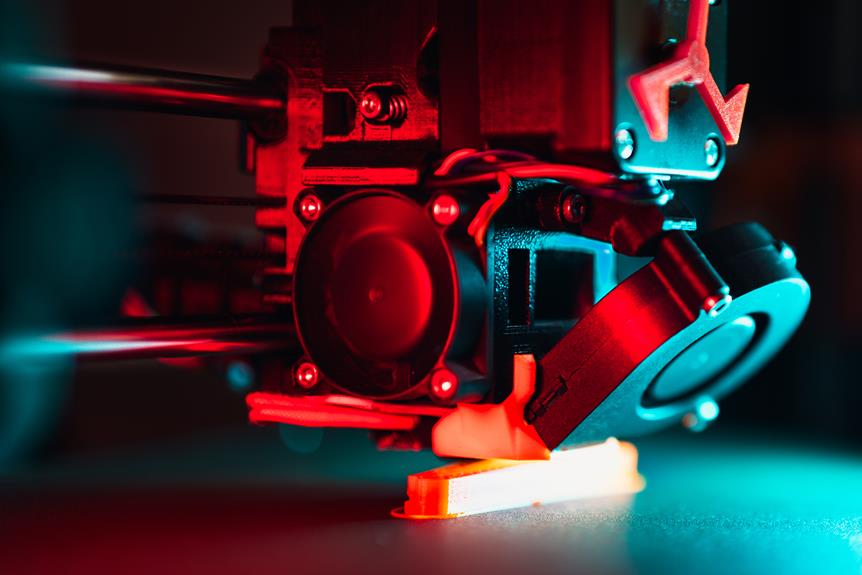
In DIY resin printer assembly, the printer consists of a build platform, resin tank, and a light source. The build platform is lowered into the resin tank, and a single layer of resin is spread across the build platform. The light source, typically an ultraviolet (UV) laser or a digital light processing (DLP) projector, then exposes the resin to cure it, solidifying the desired shape. This process is repeated layer by layer until the entire object is printed.
It is crucial to understand the importance of proper ventilation and safety precautions when working with resin. Resin emits fumes that can be harmful if inhaled, so it is recommended to work in a well-ventilated area and use appropriate personal protective equipment.
Essential Tools and Materials for Resin Printing
To ensure successful resin printing projects, it is imperative to acquire and utilize the essential tools and materials necessary for the process. Here are three key items that are crucial for resin printing:
- Resin: The primary material used in resin printing is the liquid photopolymer resin. It comes in various formulations, each with different properties such as flexibility or hardness. It is important to choose the resin that suits your project requirements.
- Resin Printer: A resin printer, specifically a Stereolithography Apparatus (SLA) 3D printer, is essential for resin printing. These printers use a laser or a projector to selectively cure the resin layer by layer, resulting in highly detailed and accurate prints.
- Curing Station: Once the print is completed, it needs to be properly cured. A curing station is used to expose the printed object to UV light, which helps in fully solidifying the resin and improving its mechanical properties. It is important to ensure that the curing station has the appropriate wavelength of UV light for the specific resin being used.
Tips and Tricks for Successful Resin Printing
For optimal results, utilizing both proper technique and adequate preparation is key when aiming for successful resin printing projects. Here are some tips and tricks to help you achieve the best results:
| Tip | Description | Benefits |
|---|---|---|
| Clean the build platform | Ensure that the build platform is clean and free from any dust or debris. | Improves adhesion and prevents print failure. |
| Level the build plate | Properly level the build plate to ensure a uniform layer thickness and improve print quality. | Minimizes the chances of warping or failed prints. |
| Use supports effectively | Use supports when necessary to provide stability and prevent print deformations. | Helps maintain the structural integrity of the print. |
| Post-process prints | After printing, wash the prints in isopropyl alcohol and cure them under UV light for better quality. | Enhances the appearance and strength of the final print. |
By following these tips, you will be able to improve your resin printing success rate and produce high-quality prints. In the next section, we will explore advanced resin printing techniques that will take your projects to the next level.
Transition: Now that you have mastered the basic tips and tricks for successful resin printing, let's dive into exploring advanced techniques that can elevate your 3D printing projects even further.
Exploring Advanced Resin Printing Techniques
This section will explore advanced resin printing techniques, specifically focusing on resin curing methods and print quality optimization.
By understanding different methods of resin curing, users can achieve optimal results in terms of strength, durability, and surface finish.
Additionally, we will delve into techniques for optimizing print quality, such as adjusting exposure settings, using support structures effectively, and post-processing methods to enhance the final print.
Resin Curing Methods
One of the key aspects of advanced resin printing techniques is the implementation of multiple resin curing methods. These methods are crucial in ensuring the proper solidification and hardening of the printed resin objects.
Here are three common resin curing methods used in advanced resin printing:
- UV Curing: This method involves exposing the printed resin to ultraviolet (UV) light, which triggers a chemical reaction that causes the resin to cure and solidify. UV curing is widely used due to its speed and efficiency.
- Heat Curing: In this method, the printed resin is heated to a specific temperature for a set amount of time, allowing it to cure and harden. Heat curing is often used for resins that require higher temperatures for complete solidification.
- Chemical Curing: Some resins require the use of specific chemicals to initiate the curing process. These chemicals react with the resin, causing it to harden. Chemical curing is often used for resins with unique properties or specific curing requirements.
Print Quality Optimization
The implementation of advanced resin printing techniques allows for the optimization of print quality, resulting in high-resolution and precise 3D printed objects. To achieve the best print quality, several factors need to be considered.
One important aspect is the layer height, which determines the resolution of the printed object. Smaller layer heights result in finer details but may increase printing time.
Additionally, adjusting exposure time and curing intensity can significantly impact the quality of the printed object. Fine-tuning these parameters can help reduce layer lines and improve surface smoothness.
Another technique is using anti-aliasing, which smooths out jagged edges and improves overall print quality.
Furthermore, optimizing support structures and orientation can minimize the need for post-processing and enhance the final print quality.
DIY Resin Printing Projects for Beginners
An individual interested in exploring resin printing as a beginner can embark on various DIY projects to gain hands-on experience and develop their skills in this innovative technology. Resin printing offers high resolution and intricate details, making it ideal for creating small, complex objects.
Here are three DIY resin printing projects for beginners:
- Miniature Figurines: Create small, detailed figurines using resin printing. This project allows beginners to practice fine detail work and experiment with different post-processing techniques to enhance the final result.
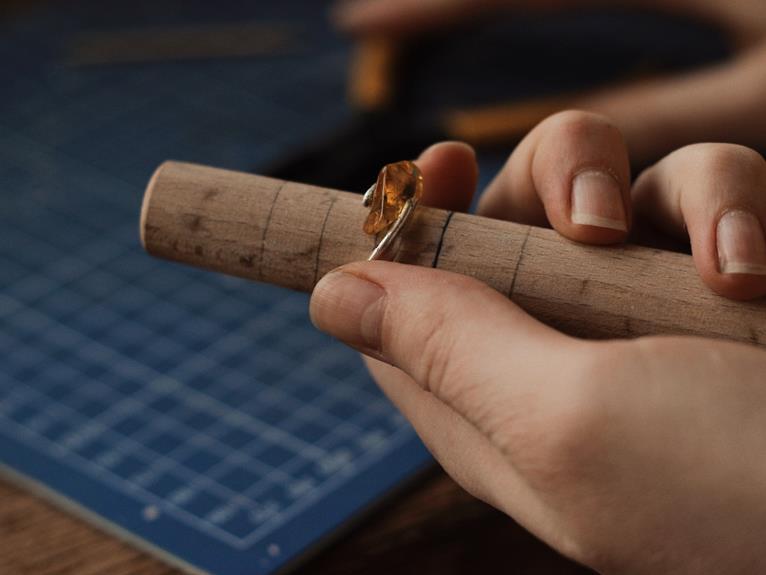
- Jewelry Design: Resin printing is perfect for creating unique and customized jewelry pieces. Beginners can design and print their own rings, earrings, pendants, and other accessories, exploring various shapes, sizes, and textures.
- Prototyping and Functional Parts: Resin printing is not just limited to artistic projects. Beginners can use it to prototype functional parts, such as brackets, casings, or mechanical components. This allows them to familiarize themselves with the versatility of resin printing and its applications in various industries.
Pushing the Limits: Ambitious Resin Printing Projects
Achieving unprecedented levels of intricacy and size, ambitious resin printing projects showcase the remarkable potential of this technology in pushing the boundaries of design and manufacturing. These projects demonstrate the ability of SLA 3D printers to create highly detailed and complex objects that were previously impossible or extremely difficult to produce using traditional manufacturing methods.
One example of an ambitious resin printing project is the creation of intricate jewelry designs. With the high resolution and precise layering capabilities of SLA 3D printers, designers can now produce intricate and delicate jewelry pieces with ease. The table below showcases some stunning examples of resin-printed jewelry projects:
| Project | Description |
|---|---|
| 1 | Resin-printed necklace with intricate filigree detailing. |
| 2 | Resin-printed ring with a complex lattice structure. |
| 3 | Resin-printed earrings with intricate floral patterns. |
Another ambitious application of resin printing is in the field of architecture. Architects can now use SLA 3D printers to create highly detailed architectural models that accurately represent their designs. This enables them to visualize and communicate their ideas more effectively. The table below highlights some impressive resin-printed architectural models:
| Project | Description |
|---|---|
| 1 | Resin-printed scale model of a futuristic skyscraper. |
| 2 | Resin-printed model of a historical building with intricate façade details. |
| 3 | Resin-printed model of an urban development project showcasing landscaping and building placement. |
These ambitious resin printing projects demonstrate the unlimited possibilities of this technology, pushing the boundaries of what can be achieved in design and manufacturing. As the technology continues to advance, we can expect even more groundbreaking projects in the future.
Troubleshooting Common Issues in Resin Printing
Identifying and addressing common issues in resin printing can help ensure a smooth and successful printing process. Resin printing, while capable of producing highly detailed and intricate prints, can sometimes encounter problems that can hinder the outcome. Here are three common issues that may arise during resin printing:
- Incorrect leveling: Uneven leveling of the build platform can lead to poor adhesion and inaccurate prints. Regularly check and adjust the leveling to ensure it is properly aligned.
- Insufficient support structures: Inadequate or poorly designed support structures can result in print failures or deformities. Ensure that your model has enough supports in the right places to provide stability during the printing process.
- Overcuring or undercuring: Improper exposure times or incorrect settings can lead to overcured or undercured prints. This can cause brittle or weak parts, loss of detail, or incomplete curing. Experiment with exposure times and settings to achieve optimal results.
By addressing these common issues, resin printing enthusiasts can overcome challenges and achieve better prints.
Now, let's move on to the next section where we will showcase incredible resin 3D prints that demonstrate the potential of this technology.
Showcasing Incredible Resin 3D Prints
Resin 3D printing offers unique techniques that result in exceptional print quality and inspiring designs. From intricate details and smooth surfaces to the ability to create complex shapes, resin printing allows for a level of precision and realism that is hard to achieve with other printing methods.
These incredible resin prints showcase the possibilities of this technology and the creativity of those who utilize it.
Unique Resin Print Techniques
While there are various techniques involved in resin 3D printing, one particularly unique method stands out for its ability to showcase incredible 3D prints. This method is known as 'hollowing out' or 'shell printing.' By hollowing out the interior of a model, users are able to achieve impressive results while reducing material consumption and print times. This technique involves creating a thin outer shell that encloses an empty space within the model, resulting in a lightweight yet visually striking print.
Additionally, another technique that yields exceptional results is the use of transparent or translucent resins. These resins allow for the creation of intricate and delicate prints with a high level of detail.
Lastly, the technique of multi-color printing enables users to produce vibrant and eye-catching 3D prints by using different color resins for various parts of the model. These unique resin print techniques offer endless possibilities for creating visually stunning and intricate prints.
Transitioning into the subsequent section about exceptional resin print quality, it is important to explore the factors that contribute to achieving outstanding results.
Exceptional Resin Print Quality
With careful attention to detail and the utilization of advanced printing techniques, achieving exceptional resin print quality is possible in order to showcase incredible 3D prints. Resin 3D printers offer superior accuracy, smoothness, and intricate details compared to other 3D printing technologies. The layer thickness, or resolution, of these printers can go as low as 25 microns, resulting in highly detailed and precise prints.
Additionally, the use of high-quality resins and precise curing processes contribute to the exceptional print quality. The ability to produce complex geometries, intricate patterns, and smooth surfaces make resin printing ideal for creating intricate jewelry pieces, miniature figurines, and detailed prototypes. The exceptional resin print quality achieved by these printers opens up a world of possibilities for designers, artists, and hobbyists looking to bring their creations to life.
Transition: Now that we have explored the capabilities of achieving exceptional resin print quality, let's delve into some inspiring resin print designs that showcase the full potential of this technology.
Inspiring Resin Print Designs
The creativity and craftsmanship displayed in these resin print designs highlight the incredible potential of 3D printing technology. Resin printing allows for intricate details and smooth surfaces, making it ideal for creating stunning and highly detailed objects.
Here are three inspiring resin print designs that showcase the capabilities of this technology:
- A miniature statue of a famous landmark, such as the Eiffel Tower or the Statue of Liberty, with intricate details and accurate proportions.
- A jewelry piece, like a pendant or a ring, featuring intricate patterns and textures that would be difficult to achieve through traditional manufacturing methods.
- A prototype for a product design, showcasing the ability to create complex and functional objects with precise dimensions.
These examples demonstrate how resin 3D printing can bring ideas to life with remarkable precision and detail, opening up endless possibilities for designers and creators.
Frequently Asked Questions
How Much Does a DIY SLA 3D Printer Cost on Average?
The average cost of a DIY SLA 3D printer can vary depending on factors such as the quality of components, features, and build size. Generally, prices range from $500 to $2000, with some high-end kits exceeding $3000.
Are There Any Safety Precautions I Should Take When Working With Resin Printing?
When working with resin printing, it is crucial to prioritize safety precautions. Adequate ventilation, protective equipment like gloves and goggles, and following proper handling and disposal procedures are essential to prevent any potential harm or accidents.
Can I Use Any Type of Resin With a DIY SLA 3D Printer, or Are There Specific Types That Work Best?
When using a DIY SLA 3D printer, it is important to use specific types of resin that are compatible with the printer. Not all resins will work effectively, so it is recommended to use resins that are specifically designed for SLA printing.
How Long Does It Typically Take to Print an Object Using a DIY SLA 3D Printer?
The typical print time for an object using a DIY SLA 3D printer can vary depending on factors such as the size and complexity of the object, the resolution settings, and the speed of the printer.
Can I Use My Own Designs or Do I Need to Find Pre-Made Files to Print With a DIY SLA 3D Printer?
Yes, you can use your own designs or find pre-made files to print with a DIY SLA 3D printer. This allows for customization and creativity in creating objects that meet your specific needs and preferences.
Conclusion
In conclusion, diving into the world of DIY SLA 3D printer projects can be an exciting adventure in resin printing. By choosing the right printer, understanding the basics of resin printing, acquiring essential tools and materials, and mastering tips and tricks for success, you can create stunning resin 3D prints.
With advanced techniques and ambitious projects, you can push the limits of resin printing. And if you encounter any issues, troubleshooting common problems will help you overcome them.
The possibilities for incredible resin 3D prints are endless.