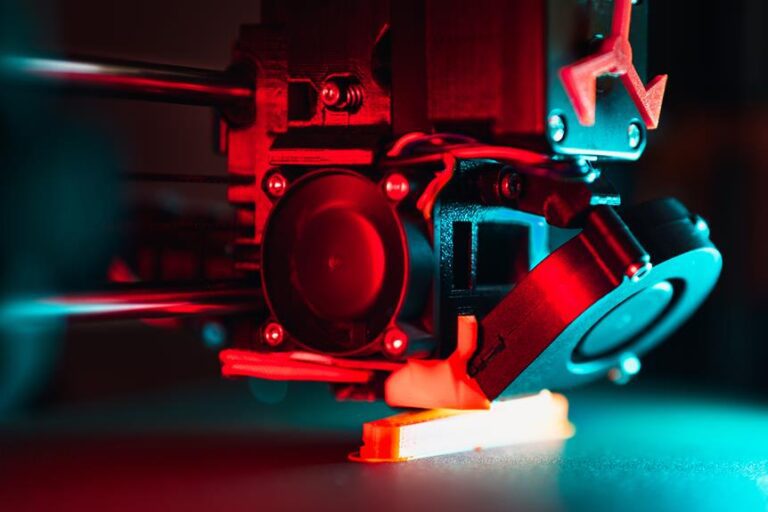
Troubleshooting 3D Printer Extruder Issues: Causes and Fixes
Discover the key to unlocking flawless 3D printing with our comprehensive guide on troubleshooting extruder issues.
Uncover the mysteries behind common problems such as clogs, filament jams, temperature fluctuations, and more.
Gain insight into the causes and learn precise fixes to overcome challenges like under-extrusion, over-extrusion, and nozzle blockages.
With our expert tips and detailed instructions, you'll be equipped to calibrate your extruder for optimal performance and achieve unparalleled printing precision.
Prepare to liberate your 3D printing potential and conquer any extruder obstacle that comes your way.
Key Takeaways
- Regular extruder cleaning and maintenance can help prevent clogs and filament jamming.
- Proper calibration of extruder temperature, speed settings, and filament diameter can resolve temperature fluctuations, filament grinding, and under-extrusion.
- Inspecting the filament for deformations, checking for loose or damaged parts in the extruder assembly, and performing diagnostic steps can help identify and resolve filament jamming issues.
- Checking and replacing the heating element if necessary, ensuring efficient cooling, and performing PID autotuning can address temperature stability issues.
Common Causes of Extruder Clogs
One of the most frequent causes of extruder clogs in 3D printers is a buildup of filament residue. This occurs when small bits of filament accumulate in the nozzle, hindering the smooth flow of material.
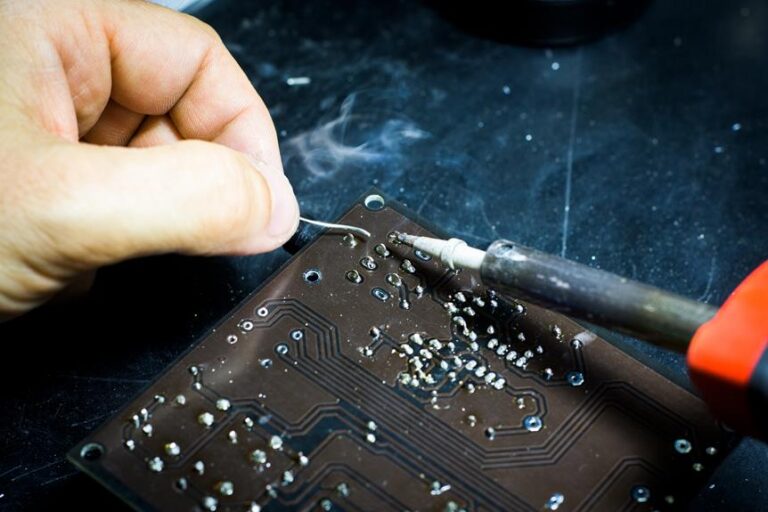
Troubleshooting 3D printer extruder issues requires a thorough understanding of the underlying hardware errors.
To address this issue, it is important to clean the extruder regularly. Start by removing any remaining filament from the printer and heating the nozzle to the recommended temperature. Once heated, gently clean the nozzle using a fine needle or a specialized cleaning tool to remove any residue.
Another common cause of extruder clogs is improper filament loading. Ensure that the filament is properly inserted into the extruder and that it is not tangled or misaligned. Additionally, dust or debris on the filament can also cause clogs. Wipe the filament clean before loading it into the printer to prevent any potential issues.
Troubleshooting layer shifts in 3D printing can also help identify and resolve extruder clogs. These layer shifts occur when the extruder is not properly calibrated or when the print bed is not level. Check the printer's settings and adjust them accordingly to ensure accurate and consistent extrusion.
Steps to Identify Filament Jamming Issues
To effectively address filament jamming issues in a 3D printer, it is essential to carefully observe the extruder's behavior and perform a series of diagnostic steps. By following these steps, you can pinpoint the cause of the jam and take appropriate action:
- Inspect the filament: Check for any signs of deformation or irregularities in the filament. Look for bends, knots, or excessive dust, as these can cause blockages in the extruder.
- Check the extruder assembly: Examine the extruder assembly for any loose or damaged parts, such as a clogged nozzle, a worn-out drive gear, or a misaligned filament path. These issues can impede the smooth flow of filament.
- Review the extrusion settings: Ensure that the extrusion temperature and speed settings are appropriate for the filament being used. Incorrect settings can lead to filament jamming.
- Clean the extruder: Remove any accumulated debris or filament remnants from the extruder. Clean the nozzle and the filament path to prevent blockages.
By carefully following these steps, you can identify and address filament jamming issues in your 3D printer, allowing for smooth and uninterrupted printing.
Now, let's move on to the next section, where we will discuss the topic of understanding extruder temperature fluctuations.
Understanding Extruder Temperature Fluctuations
While troubleshooting 3D printer extruder issues, it is crucial to grasp the concept of understanding extruder temperature fluctuations. The extruder temperature plays a vital role in the successful printing of 3D objects. Temperature fluctuations can lead to various problems, including poor print quality, filament clogs, and even damage to the printer itself.
One common cause of temperature fluctuations is improper PID tuning. PID (Proportional Integral Derivative) is a control algorithm that regulates the temperature of the extruder. If the PID values are not properly calibrated, the temperature can oscillate, causing instability in the printing process. To address this issue, it is recommended to perform PID autotuning, which adjusts the PID values automatically based on the printer's response to temperature changes.
Another factor that can contribute to temperature fluctuations is a faulty or aging heating element. Over time, the heating element may lose its efficiency and struggle to maintain a stable temperature. In such cases, replacing the heating element can resolve the issue and ensure consistent extruder temperature.
Additionally, inadequate or improper cooling can also lead to temperature fluctuations. Insufficient cooling can cause the extruder to overheat, while excessive cooling can result in temperature drops. It is essential to ensure that the printer's cooling system, including fans and heat sinks, is functioning correctly and effectively dissipating heat.
Understanding and addressing extruder temperature fluctuations is crucial for achieving optimal print quality and avoiding potential issues during the 3D printing process. By properly tuning the PID values, checking and replacing the heating element if necessary, and ensuring efficient cooling, users can maintain a stable and consistent extruder temperature, leading to successful prints.
Troubleshooting Filament Grinding Problems
Identifying and resolving filament grinding problems is essential to ensure smooth and consistent filament extrusion during the 3D printing process. Filament grinding occurs when the extruder motor is unable to push the filament through the nozzle, resulting in a grinding or chewing sound. This issue can lead to failed prints, clogged nozzles, and even damage to the extruder assembly.
Here are four common causes of filament grinding problems and their respective solutions:
- Incorrect filament diameter: Ensure that the filament diameter is accurately set in the slicing software and matches the actual diameter of the filament being used. Adjust the settings if necessary.
- Extruder motor tension: Check the tension of the extruder motor's filament drive gear. If it is too loose, the gear may slip, causing filament grinding. Adjust the tension to ensure a firm grip on the filament.
- Nozzle clog: A partially or fully clogged nozzle can cause filament grinding. Clean the nozzle by using a nozzle cleaning needle or by performing a cold pull to remove any debris or blockages.
- Extruder temperature: Inadequate extruder temperature can result in insufficient melting of the filament, leading to grinding. Ensure that the extruder temperature is set correctly for the type of filament being used.
Resolving Under-Extrusion: Causes and Solutions
One common issue that can arise during 3D printing is under-extrusion, and addressing the causes and solutions for this problem is crucial for achieving high-quality prints.
Under-extrusion occurs when the 3D printer fails to extrude the expected amount of filament, resulting in gaps and weak structures in the printed object.
There are several potential causes for under-extrusion. Firstly, a clogged nozzle can restrict the flow of filament, leading to insufficient extrusion. This can be resolved by cleaning or replacing the nozzle.
Secondly, incorrect filament diameter settings in the slicing software can cause under-extrusion. It is important to ensure that the software settings match the actual filament diameter.
Another possible cause is a loose or slipping extruder gear, which can be fixed by tightening or replacing the gear.
Additionally, a low extruder temperature or insufficient filament tension can contribute to under-extrusion. Increasing the temperature and adjusting the filament tension can help alleviate this issue.
Finally, a worn-out or damaged filament can also lead to under-extrusion. It is advisable to use fresh and high-quality filament to avoid this problem.
Dealing With Over-Extrusion: Fixes and Tips
To effectively address over-extrusion issues in 3D printing, it is important to implement appropriate fixes and tips. Over-extrusion occurs when the printer deposits more filament than necessary, resulting in excessive material buildup and poor print quality. Here are some fixes and tips to help you deal with over-extrusion:
- Check the filament diameter: Measure the filament diameter using a caliper and ensure it matches the settings in your slicer software. Adjust the filament diameter setting if necessary to ensure accurate extrusion.
- Calibrate the extruder steps per millimeter: Use a calibration cube or other test prints to determine the correct number of steps your extruder needs to take to extrude a specific distance. Adjust the steps per millimeter setting in your printer firmware accordingly.
- Reduce the flow rate: Decrease the flow rate setting in your slicer software to reduce the amount of filament being extruded. Gradually adjust the flow rate until you achieve the desired print quality.
- Check for clogs and jams: Inspect the nozzle and hotend for any clogs or jams that may be causing over-extrusion. Clear any obstructions using a nozzle cleaning tool or by performing a cold pull.
Tackling Nozzle Blockages and Cleaning Techniques
To effectively address nozzle blockages and ensure optimal printing performance, it is essential to understand the causes and implement appropriate cleaning techniques. Nozzle blockages can occur due to various reasons, such as the accumulation of debris, filament residue, or foreign objects. These blockages can hinder the smooth flow of filament, leading to poor print quality or even complete extruder failure.
To tackle nozzle blockages, start by removing the filament from the extruder and heating the nozzle to the recommended temperature. Once heated, use a fine wire or a specialized nozzle cleaning tool to gently remove any visible debris or filament residue. Be careful not to scratch or damage the nozzle.
If the blockage persists, a more thorough cleaning method may be necessary. This can involve disassembling the extruder and using a nozzle cleaning solution or a heated ultrasonic bath to dissolve or dislodge stubborn blockages. However, be cautious when disassembling the extruder, as it may void any warranty or require expert knowledge.
Regular maintenance and preventive measures can also help prevent nozzle blockages. This includes conducting regular inspections, using high-quality filament, and keeping the printing environment clean. Additionally, some printers may have features like automatic nozzle cleaning or filament purging, which can help prevent blockages.
How to Calibrate the Extruder for Optimal Performance
To achieve optimal performance of the extruder, it is crucial to calibrate both the temperature and filament feed rate.
Temperature calibration techniques involve adjusting the temperature settings to ensure proper melting and flow of the filament.
Filament feed rate adjustment, on the other hand, focuses on fine-tuning the rate at which the filament is extruded to prevent under or over-extrusion issues.
Both of these calibration processes play a vital role in achieving high-quality prints with accurate dimensions and proper adhesion between layers.
Temperature Calibration Techniques
One of the key steps in achieving optimal performance from your 3D printer extruder is to accurately calibrate the temperature. Temperature calibration is crucial because it ensures that the extruder is operating at the correct temperature for the specific filament being used.
Here are four temperature calibration techniques to help you achieve optimal performance:
- PID Tuning: Use PID tuning to fine-tune the temperature control algorithm of your printer. This technique adjusts the Proportional, Integral, and Derivative values to optimize temperature stability and response.
- Thermistor Calibration: Calibrate the thermistor reading by comparing it to a known accurate temperature source. This will ensure that the temperature readings are correct and reliable.
- Temperature Tower: Print a temperature tower that consists of multiple sections, each printed at a different temperature. This allows you to identify the ideal temperature range for your filament.
- External Temperature Sensors: Consider using external temperature sensors to measure the actual temperature at the nozzle or hot end. This can provide more accurate temperature readings and improve overall performance.
Filament Feed Rate Adjustment
Calibrating the filament feed rate is essential to achieving optimal performance from your 3D printer extruder. The filament feed rate refers to the speed at which the filament is pushed into the hot end of the extruder. If the feed rate is too high, the extruder may struggle to push the filament through, resulting in under-extrusion. On the other hand, if the feed rate is too low, the extruder may push the filament too quickly, causing over-extrusion and resulting in poor print quality.
To calibrate the filament feed rate, you can use a calibration cube or a flow rate test print. Start by adjusting the flow rate setting in your printer's software and printing the test object. Measure the dimensions of the printed object using calipers and compare them to the expected dimensions. If the dimensions are off, adjust the flow rate setting accordingly and repeat the process until the desired results are achieved.
Frequently Asked Questions
What Are the Common Problems That Can Occur During the Calibration Process?
During the calibration process, common problems that can occur include incorrect temperature settings, improper bed leveling, filament feeding issues, and insufficient or excessive extrusion. These issues can be resolved through careful adjustment and troubleshooting techniques.
How Can I Prevent Filament From Getting Stuck in the Extruder Nozzle?
To prevent filament from getting stuck in the extruder nozzle, it is essential to ensure proper filament diameter, clean the nozzle regularly, use the correct temperature settings, and maintain a consistent flow rate during the printing process.
Are There Any Specific Brands or Types of Filament That Are More Prone to Extruder Clogs?
Some brands or types of filament may be more prone to extruder clogs due to their composition or quality control issues. It is important to research and choose high-quality filaments that have good reviews and are known to work well with your specific 3D printer model.
What Should I Do if My Extruder Temperature Keeps Fluctuating During a Print Job?
To address fluctuating extruder temperature during a print job, it is crucial to identify the underlying causes. This may involve examining the heating element, thermistor, or cooling system, and implementing appropriate fixes such as recalibration or replacing faulty components.
Can Using a Different Nozzle Size Affect the Performance of the Extruder?
Using a different nozzle size can affect the performance of the extruder. It can alter the flow rate, layer height, and overall print quality. Adjustments to temperature, speed, and calibration may be necessary.
Conclusion
In conclusion, troubleshooting 3D printer extruder issues requires a thorough understanding of the common causes and fixes. By identifying filament jamming issues, understanding temperature fluctuations, and addressing problems such as filament grinding, under-extrusion, and over-extrusion, users can maintain optimal performance.
Additionally, tackling nozzle blockages through effective cleaning techniques and calibrating the extruder can further enhance the printing process. While some may argue that troubleshooting can be time-consuming, it is essential for achieving high-quality prints and maximizing the lifespan of the 3D printer.