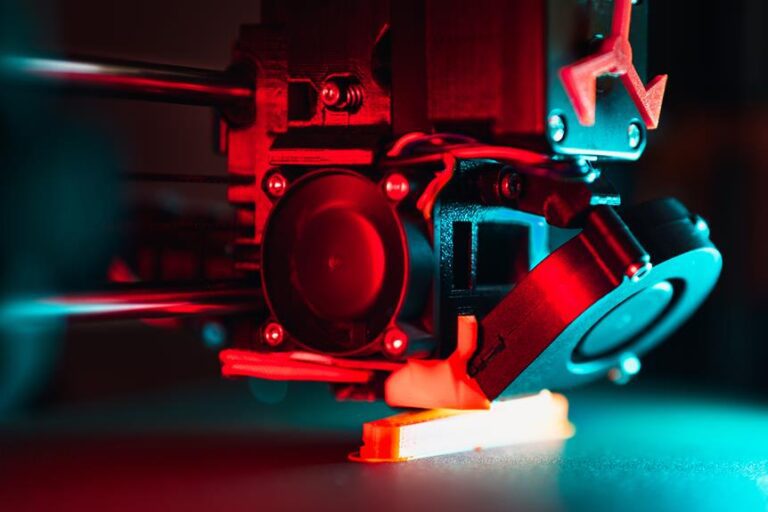
Calibrating 3D Printer Settings for Quality Prints: Step-by-Step Guide
In the world of 3D printing, achieving high-quality prints is the pinnacle of success.
However, it is no secret that calibrating the settings of a 3D printer can be a daunting task. Fear not, for this step-by-step guide aims to liberate you from the complexities of calibration.
By meticulously adjusting the extruder steps, nozzle temperature, print speed, and more, you will unlock the true potential of your printer and produce flawless prints that surpass all expectations.
So, let us embark on this journey towards print perfection.
Key Takeaways
- Calibrating 3D printer settings ensures functioning and consistent high-quality prints
- Using high-quality materials with consistent diameter and adhesion properties is crucial
- Proper leveling of the build plate ensures optimal print quality and prevents detachment
- Adjusting the extruder steps per millimeter (E-steps) fine-tunes printer settings and improves print accuracy and quality.
Understanding the Importance of Calibrating 3D Printer Settings
Understanding the importance of calibrating 3D printer settings is crucial for achieving optimal print quality. Calibrating the settings of your 3D printer ensures that it is functioning correctly and producing high-quality prints consistently. By calibrating the printer, you can troubleshoot issues such as layer shifts and under-extrusion, which can negatively impact the print quality.
Calibrating your 3D printer settings for quality prints involves adjusting various parameters such as nozzle height, temperature, extrusion multiplier, and print speed. Each of these settings plays a vital role in the final print quality. By setting the correct nozzle height, you can ensure that the filament is properly deposited on the print bed, preventing layer shifts. Adjusting the temperature and extrusion multiplier helps in resolving under-extrusion issues, where the printer fails to deposit enough filament.
By calibrating these settings, you can achieve precise and accurate prints, with smooth layers and minimal defects. This is especially important for intricate and complex designs, where even the slightest deviation in settings can cause significant print quality issues.
To calibrate your 3D printer settings, you will need to gather the necessary tools and materials.
Gathering the Necessary Tools and Materials
To successfully calibrate your 3D printer settings for quality prints, it is crucial to gather the necessary tools and materials.
The essential tools include a digital caliper, a filament diameter measuring device, and a temperature gun. These tools will allow you to accurately measure and adjust various printer settings, ensuring optimal print quality.
Additionally, using high-quality materials such as filaments with consistent diameter and reliable adhesion properties is essential for achieving the desired print results.
Essential Tools for Calibration
When calibrating your 3D printer for quality prints, it is important to gather the necessary tools and materials for the calibration process. Here are three essential tools you will need:
- Calipers: A precise measuring tool like calipers is crucial for accurate calibration. It allows you to measure the dimensions of printed objects and compare them to the desired specifications.
- Feeler Gauge: This thin metal strip with various thicknesses helps in adjusting the printer's bed level. It ensures that the nozzle is at the correct distance from the print surface, resulting in improved print quality and adherence.
- Filament Diameter Gauge: To achieve accurate extrusion, it is essential to measure the filament diameter accurately. This gauge allows you to determine the diameter of your filament, ensuring the printer's settings are correctly calibrated.
By gathering these tools, you will be well-prepared to calibrate your 3D printer and achieve high-quality prints.
Now, let's explore the importance of using quality materials in the calibration process.
Importance of Quality Materials
Two essential factors to consider in the calibration process are the quality of materials used and the gathering of necessary tools and materials.
When it comes to 3D printing, the quality of materials plays a crucial role in achieving high-quality prints. Using subpar materials can result in poor print resolution, layer adhesion issues, and overall low print quality. Therefore, it is important to invest in quality materials that are specifically designed for 3D printing. These materials should have consistent filament diameter, excellent melting properties, and minimal impurities.
Additionally, gathering the necessary tools and materials is essential for a successful calibration process. This includes a reliable 3D printer, filament spools, a slicer software, a digital caliper for measuring filament diameter, and a calibration cube for testing print accuracy.
Leveling the Build Plate for Optimal Print Quality
Achieving optimal print quality in 3D printing requires precise leveling of the build plate.
A properly leveled build plate ensures that the first layer adheres evenly to the surface, preventing issues such as warping, curling, or uneven prints.
In this section, we will explore the importance of plate leveling and discuss troubleshooting techniques to address uneven prints.
Importance of Plate Leveling
Proper plate leveling is crucial for ensuring optimal print quality on a 3D printer. When the build plate is not leveled correctly, it can lead to issues such as uneven extrusion, adhesion problems, and warping of the printed object. To achieve the best results, it is important to pay attention to the plate leveling process.
Here are three reasons why plate leveling is important:
- Print bed adhesion: A level build plate ensures that the first layer of the print adheres properly to the bed, preventing any potential warping or detachment during the printing process.
- Even extrusion: When the build plate is leveled, the nozzle maintains a consistent distance from the bed, resulting in even extrusion of the filament and consistent layer height throughout the print.
- Print accuracy: Proper plate leveling ensures that the print is accurately positioned on the bed, allowing for precise and accurate prints without any misalignment.
Troubleshooting Uneven Prints
Troubleshooting uneven prints requires careful attention to the leveling of the build plate in order to achieve optimal print quality.
When the build plate is not properly leveled, it can result in prints that are uneven or have inconsistent layer adhesion.
To start troubleshooting, ensure that the build plate is clean and free from any debris or adhesive residue.
Next, use a leveling tool or a piece of paper to adjust the build plate height, making sure that it is level across all corners and the center.
Take precise measurements and make small adjustments until the build plate is perfectly leveled.
Once the build plate is properly leveled, you can move on to adjusting the extruder steps per millimeter (e-steps) for fine-tuning your 3D printer settings.
Adjusting the Extruder Steps per Millimeter (E-steps)
Optimizing the Extruder Steps per Millimeter (E-steps) is a crucial step in calibrating 3D printer settings for achieving high-quality prints. The E-steps determine the amount of filament that is extruded by the printer for a given length of filament movement. If the E-steps are not calibrated correctly, it can lead to under or over extrusion, resulting in poor print quality.
To adjust the Extruder Steps per Millimeter, follow these steps:
- Measure the filament:
Measure a length of filament (e.g., 100mm) and mark it. Make sure to use a precise measuring tool for accurate results.
- Calculate the current E-step value:
Send a command to your printer to extrude the measured length of filament. Measure the amount of filament that was actually extruded. Divide the desired length by the actual length to calculate the current E-step value.
- Adjust the E-steps:
Access the firmware settings of your 3D printer and locate the E-step value. Update the value with the calculated E-step value obtained in the previous step. Save the changes and restart your printer.
Fine-tuning the Nozzle Temperature for Perfect Prints
To achieve the desired print quality, it is essential to fine-tune the nozzle temperature with precision and accuracy. The nozzle temperature directly affects the material's flow and adhesion, which play a crucial role in the final print's quality and strength. When the temperature is too low, the filament may not melt properly, leading to under-extrusion and weak layer adhesion. On the other hand, when the temperature is too high, the filament may become overly liquid, resulting in stringing, oozing, and poor detail reproduction.
To find the optimal nozzle temperature for your specific filament and printer setup, it is recommended to start with the manufacturer's recommended temperature range as a baseline. Then, perform test prints at different temperatures within this range, gradually increasing or decreasing the temperature by increments of 5 degrees Celsius. Evaluate each print for signs of under-extrusion, over-extrusion, stringing, and overall print quality. Based on these observations, fine-tune the temperature until the best balance between flow, adhesion, and detail reproduction is achieved.
Once the nozzle temperature has been fine-tuned, the next step is to balance the print speed and layer height, which will be discussed in the following section.
Balancing the Print Speed and Layer Height
Achieving optimal print quality requires finding the right balance between print speed and layer height. These two factors are closely related and can significantly affect the overall quality of your 3D prints.
Here are three key considerations when it comes to balancing print speed and layer height:
- Print Speed: Increasing the print speed can help to reduce the overall printing time. However, it's important to find the right balance, as printing too fast can result in a decrease in print quality. Higher speeds can cause issues such as poor layer adhesion, inaccuracies in dimensions, and even potential filament clogging. It is recommended to start with a moderate print speed and gradually increase it while monitoring the print quality.
- Layer Height: Layer height refers to the thickness of each layer that is deposited during the printing process. Smaller layer heights generally result in higher print quality, as they allow for finer details and smoother surfaces. However, using smaller layer heights can significantly increase the overall printing time. It is important to consider the trade-off between print quality and printing time when selecting the layer height.
- Finding the Balance: Achieving the right balance between print speed and layer height depends on the specific requirements of your print. It may be necessary to experiment with different settings and adjust them based on the desired print quality, printing time, and the capabilities of your 3D printer. It is recommended to start with manufacturer-recommended settings and make gradual adjustments to find the optimal balance for your specific prints.
Optimizing Retraction Settings to Reduce Stringing
Minimizing stringing in 3D prints can be achieved by optimizing retraction settings. Retraction is the process of pulling back the filament between extrusions to prevent oozing and stringing. By properly configuring retraction settings, you can reduce or eliminate the unsightly strings that often appear between printed objects.
To optimize retraction settings, start by adjusting the retraction distance. This parameter determines how far the filament is pulled back. Increasing the retraction distance will help to prevent stringing, but setting it too high can lead to other issues such as under extrusion. It is recommended to start with a conservative value, typically around 1-2 mm, and then gradually increase it if needed.
Next, adjust the retraction speed. This parameter controls how quickly the filament is retracted. A higher retraction speed can help to minimize stringing, but setting it too high may cause the filament to jam. Start with a moderate retraction speed, around 40-60 mm/s, and fine-tune it based on the results.
Furthermore, enabling or disabling the 'retract on layer change' option can also affect stringing. If you notice stringing occurring at layer changes, enabling this option can help to reduce it.
In conclusion, optimizing retraction settings is crucial in reducing stringing in 3D prints. By adjusting the retraction distance, speed, and considering the 'retract on layer change' option, you can achieve cleaner and more precise prints.
Now, let's move on to the next section, where we will discuss testing and fine-tuning the flow rate for consistent extrusion.
Testing and Fine-tuning the Flow Rate for Consistent Extrusion
With the aim of ensuring consistent extrusion, it is important to conduct tests and make adjustments to the flow rate for your 3D printer. By fine-tuning the flow rate, you can achieve high-quality prints with accurate dimensions and minimal defects.
Below are the steps you can follow to test and optimize the flow rate:
- Calibrate the extrusion multiplier: Start by printing a calibration cube or any other small object with a single wall. Measure the wall thickness using calipers and compare it to the desired value. Adjust the extrusion multiplier in your slicer software until the printed wall matches the desired thickness.
- Check for under-extrusion: Print a test object with several solid layers, such as a solid cube or a benchy boat. Inspect the top layers for any gaps or inconsistencies. If you notice under-extrusion, increase the flow rate slightly and reprint the test object until the top layers are solid and smooth.
- Evaluate over-extrusion: Print a hollow object or a vase mode print and examine the sidewalls for any signs of over-extrusion, such as bulging or uneven layers. If over-extrusion is present, decrease the flow rate gradually until the sidewalls are uniform and free from imperfections.
Frequently Asked Questions
How Long Does It Usually Take to Calibrate 3D Printer Settings for Quality Prints?
The time required to calibrate 3D printer settings for quality prints can vary depending on factors such as the complexity of the printer, the experience of the user, and the desired level of print quality.
Can I Use Any Type of Filament for Calibrating My 3D Printer Settings?
While it is technically possible to use any type of filament for calibrating 3D printer settings, it is recommended to use the same filament type that will be used for the final prints to ensure accurate calibration and optimal print quality.
Are There Any Specific Safety Precautions I Should Take While Calibrating My 3D Printer Settings?
When calibrating 3D printer settings, it is crucial to prioritize safety. Precautions include wearing protective eyewear and gloves, ensuring proper ventilation, and avoiding exposure to high temperatures and moving parts.
Can I Calibrate My 3D Printer Settings Without Leveling the Build Plate?
While it is possible to calibrate 3D printer settings without leveling the build plate, it is not recommended as a properly leveled build plate is crucial for achieving quality prints.
What Are the Common Challenges or Problems That Can Arise During the Calibration Process?
During the calibration process for 3D printers, several challenges or problems may arise. These can include issues with bed adhesion, over-extrusion or under-extrusion, nozzle clogs, and inconsistent layer heights, all of which can impact the quality of the prints.
Conclusion
In conclusion, calibrating 3D printer settings is crucial for achieving high-quality prints.
By leveling the build plate, adjusting the extruder steps per millimeter, fine-tuning the nozzle temperature, balancing print speed and layer height, optimizing retraction settings, and testing the flow rate, users can ensure consistent and precise extrusion.
The combination of these steps will result in improved print quality and overall performance of the 3D printer.