DIY 3D Printer Kits: Your Guide to Building a Personal 3D Printer
Are you fascinated by the world of 3D printing and eager to build your own personal 3D printer? Look no further than DIY 3D printer kits, the perfect solution for those seeking a hands-on experience and the freedom to customize their machine.
In this comprehensive guide, we will walk you through the process of selecting the right kit, provide a step-by-step assembly guide, troubleshoot common issues, and offer tips for optimizing and fine-tuning your personal 3D printer.
Get ready to embark on your 3D printing journey!
Key Takeaways
- DIY 3D printer kits provide hands-on experience and enhance technical skills
- Building a DIY 3D printer fosters a sense of ownership and customization
- DIY kits offer a comprehensive understanding of printer components and functionality
- Troubleshooting and maintenance become easier with DIY 3D printer kits
The Benefits of DIY 3D Printer Kits
One of the main benefits of DIY 3D printer kits is that they allow individuals to have a hands-on experience in building their own personal 3D printer. DIY 3D printer kits offer a unique opportunity for individuals to explore and understand the intricate workings of a 3D printer by assembling it themselves. This hands-on experience not only enhances one's technical skills but also fosters a sense of ownership and pride in the final product.
Building a 3D printer from a DIY kit provides individuals with a comprehensive understanding of the printer's components and their functionality. Each step of the DIY printer assembly process offers a valuable learning experience, allowing users to gain knowledge about the various components such as the frame, motors, extruder, and control board. By actively engaging in the assembly process, individuals become familiar with the inner workings of a 3D printer, which can be immensely beneficial when it comes to troubleshooting and maintenance.
Moreover, DIY 3D printer kits offer individuals the freedom to customize their printers according to their specific needs and preferences. Users can choose from a wide range of options available in the market, such as different frame materials, nozzle sizes, and control systems. This flexibility empowers individuals to create a 3D printer that aligns perfectly with their requirements, enabling them to explore various applications and unleash their creativity.
Choosing the Right 3D Printer Kit for You
Occasionally, it can be overwhelming to choose the right 3D printer kit for you, but with careful consideration of your needs and research, you can find the perfect kit to build your personal 3D printer.
When selecting a DIY 3D printer kit, it is important to evaluate your level of expertise and the intended use of the printer. First, consider your DIY skills. Some kits are designed for beginners, with detailed instructions and pre-assembled components, while others are more suitable for experienced users who enjoy a challenge. Assessing your skill level will help you avoid frustration and ensure a successful build.
Next, determine the purpose of your 3D printer. Are you interested in printing small prototypes, functional parts, or artistic designs? Different kits offer varying print sizes, resolutions, and material compatibilities. Consider your specific requirements to choose a kit that aligns with your goals.
Additionally, take into account the availability of customer support and online communities. Building a DIY printer can be a complex process, and having access to helpful resources can greatly assist you throughout the construction.
Essential Tools and Materials for Building a 3D Printer
When building a 3D printer, it is important to gather all the essential tools and materials necessary for the construction process. These tools and materials will ensure a smooth and successful build, allowing you to create your own personalized 3D printer.
Firstly, you will need a sturdy workbench or table to assemble your 3D printer. This will provide a stable surface for the construction process. Additionally, you will need a set of screwdrivers, pliers, and wrenches to tighten and adjust the various components of the printer. These tools will allow you to securely fasten the frame, motors, and other parts together.
Next, you will require a power supply unit that is compatible with your 3D printer kit. It is crucial to choose a power supply that can provide enough voltage and current to operate the printer effectively. Additionally, you will need a computer or a microcontroller board to control the printer's movements and settings.
Furthermore, you will need a heated build plate or a print bed to ensure proper adhesion of the printed object. This will prevent warping and improve the overall print quality. Lastly, you will need filaments of various materials and colors to create your desired prints.
Step-by-Step Guide to Assembling Your DIY 3D Printer Kit
Carefully, follow this step-by-step guide to efficiently assemble your DIY 3D printer kit, ensuring a successful construction process.
- Unpack the kit: Start by unpacking all the components of your DIY 3D printer kit. Lay them out in an organized manner, ensuring that all parts are accounted for.
- Prepare the frame: Begin by assembling the frame of your 3D printer. Follow the instructions provided in the kit, making sure to tighten all screws and bolts securely.
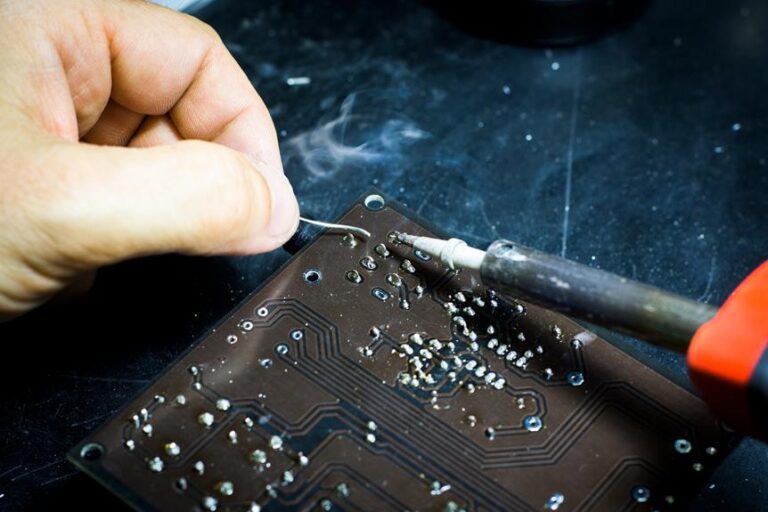
- Install the electronics: Next, install the electronic components such as the control board, power supply, and motors. Connect the wiring according to the provided instructions, ensuring proper alignment and secure connections.
- Attach the print bed and extruder: Once the frame and electronics are in place, attach the print bed and extruder. Ensure that the print bed is leveled correctly and securely attach the extruder assembly.
By following these steps, you will be on your way to assembling your own DIY 3D printer.
Remember to refer to the instruction manual and take your time during the process to ensure accuracy. Assembling your own 3D printer can be a rewarding experience, offering you the freedom to explore the world of 3D printing and unleash your creativity.
Troubleshooting Common Issues During the Building Process
Identifying and resolving common issues that arise during the building process is crucial for successfully constructing your DIY 3D printer kit. While building your personal 3D printer can be an exciting and rewarding experience, it is not without its challenges. Understanding how to troubleshoot common issues can save you time and frustration, ensuring that your printer is built correctly and functions optimally.
One common issue that may arise is incorrect wiring or loose connections. It is important to double-check all the wiring connections and ensure they are securely fastened. Loose connections can result in malfunctioning components or even damage to the printer.
Another common issue is the misalignment of printer components. This can lead to skewed prints or failed prints altogether. Properly aligning components such as the printer bed, extruder, and gantry is crucial for accurate printing.
Furthermore, calibration is a critical step in the building process. Failure to properly calibrate your printer can result in poor print quality, such as layer shifting or warped prints. Ensuring that your printer is properly calibrated will produce consistent and high-quality prints.
In the next section, we will discuss tips for optimizing and fine-tuning your personal 3D printer, which will further enhance your printing experience and the quality of your prints.
Tips for Optimizing and Fine-Tuning Your Personal 3D Printer
To achieve optimal performance and print quality, it is essential to implement various techniques and adjustments when fine-tuning your personal 3D printer. Here are some tips to help you optimize your printer:
- Calibrate your printer: Proper calibration ensures that your printer is accurately positioning the print head and extruding the right amount of filament. This includes adjusting the bed leveling, nozzle height, and extrusion multiplier.
- Upgrade your firmware: Updating your printer's firmware can provide stability improvements, new features, and bug fixes. Check the manufacturer's website or community forums for the latest firmware version compatible with your printer.
- Experiment with print settings: Adjusting parameters like layer height, print speed, and infill density can significantly impact the final print quality. Experiment with different settings to find the optimal balance between speed and quality for your specific needs.
- Fine-tune filament settings: Different filaments have varied characteristics, such as temperature requirements and adhesion properties. Take the time to calibrate your printer's temperature settings and explore different bed adhesion methods, such as using adhesives or specialized surfaces.
Frequently Asked Questions
What Are Some Common Limitations or Drawbacks of DIY 3D Printer Kits?
Common limitations or drawbacks of DIY 3D printer kits include the need for technical expertise, time-consuming assembly process, potential for errors or malfunction, limited support or troubleshooting resources, and the potential for lower quality prints compared to pre-assembled printers.
Are There Any Specific Safety Precautions or Considerations to Keep in Mind When Building a DIY 3D Printer Kit?
When building a DIY 3D printer kit, it is crucial to prioritize safety to mitigate potential risks. Considerations include proper electrical grounding, ventilation for fumes, and adherence to manufacturer's instructions for handling and maintenance.
How Long Does It Typically Take to Assemble a DIY 3D Printer Kit?
The typical assembly time for a DIY 3D printer kit varies based on the complexity of the model and the builder's experience. However, on average, it can range from a few hours to several days or even weeks.
Can I Upgrade or Modify My DIY 3D Printer Kit After It's Been Built?
Can a DIY 3D printer kit be upgraded or modified post-assembly? Yes, DIY printer kits are designed with the flexibility to accommodate upgrades and modifications, allowing users to enhance their printer's capabilities and keep up with evolving technology.
Are There Any Additional Costs or Expenses to Consider When Building a DIY 3D Printer Kit?
When building a DIY 3D printer kit, it is important to consider additional costs or expenses. These can include filament, software, upgrades, maintenance, and replacement parts, which may vary depending on the specific kit and individual needs.
Conclusion
In conclusion, DIY 3D printer kits provide numerous benefits, allowing individuals to build their own personal 3D printer.
By choosing the right kit and following a step-by-step guide, anyone can assemble their printer using essential tools and materials.
Troubleshooting common issues and optimizing the printer's performance are also important steps.
With these detailed instructions, individuals can embark on a technical and informative journey to create their own personalized 3D printing experience.